Tip 1: How to install two sata drives
Tip 1: How to install two sata drives
SATA (Serial Advanced Technology Attachment) -This is the abbreviated designation of the data exchange interface used to read and write information to computer hard drives. The fundamental difference between this standard and the previously used IDE (Integrated Drive Electronics) interface is parallel, rather than serial, data transmission. From the point of view of the technology of installing two hard drives using the SATA interface, the procedure was much simpler compared to the hard drives on the IDE bus.

You will need
- Two SATA signal cables and eight mounting screws.
Instructions
1
Prepare connecting cables and fasteners - without two SATA cables and at least six screws, there is no point in starting the hard disk installation procedure.
2
Shut down the OS and disconnect the system unit from thenetwork - disconnect the power cord or turn off the switch on the back of the system unit. It is preferable, as the more radical, the first option.
3
Remove both side panels from the system unit -you will need access from both sides to fix the screws to be installed hard drives. Side panels, as a rule, are fastened by two screws to the back wall of the case, and are detached from the chassis by a shift back about five centimeters.
4
Find on the motherboard slots forconnect the SATA cables and select on the chassis of the system unit two compartments for the installed hard disks. In this case, proceed from the length of the connecting cables - the distance from the selected compartment to the slots on the motherboard should not be too large.
5
Install both hard Disk in the selected compartments so that the connectors on them are facing the motherboard. Fix the hard drives on both sides with screws.
6
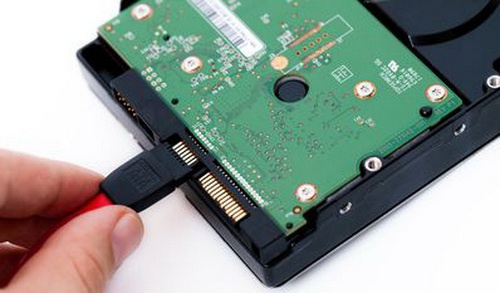
Connect each of the hard drives with a SATA cablefree SATA slots on the motherboard. Correct insertion of the plug will be easy - it is asymmetric, and it is almost impossible to do it wrong. Unlike the IDE interfaces, it does not matter which hard drive you connect to which port you are using, as there is no need to properly set jumpers on hard disks.
7
Connect the free power bus connectors to the corresponding inputs on each of the hard drives.
8
Connect the network cable and turn on the computer- As a rule, when you connect two SATA-drives, no additional settings are required in the BIOS. If you see both new hard disks in the standard file manager of the computer's operating system, then the installation is normal and you can install the side panels of the system unit.
Tip 2: How to connect a hard drive
Recently, great popularity, withselect hard drives, dial drives with a SATAII connection interface. In the sale of information storage devices, SATA power superseded the IDE. The growing popularity of the new hard disk drive line can be explained by the high speed of information exchange, as well as the continued operation of this device. Therefore, when choosing a hard disk - IDE or SATA, the choice is obvious. Especially the connection of such a device will not take much time.

You will need
- Hard drive SATAII, 2 connecting cables and SATA - IDE adapter.
Instructions
1
With all the variety of assortment in computerstores, select a hard drive of the appropriate size. Consult with the seller-consultant on this issue. The choice of the disc manufacturer brand should be taken seriously. Let's consider two situations when connecting a hard disk: - The motherboard supports the SATA drive connection - The motherboard does not support SATA drive connection.

2
Motherboard with connectivity supportSATA drive. In this case, the disk connection will not take much time and will not cause additional problems. in the motherboard integrated connectors for connecting SATA-disks. Open the 2 side covers of the system unit. If you want to change the hard drive, unscrew the hard drive mounting bolts and remove it. Put a new one and secure it with the bolts. Connect 2 connecting cables: one to the motherboard, the other to the power supply. Then close the side covers of the system unit.

3
Motherboard without support connectionSATA drive. In this case, you will have to use additional adapters to connect the hard drive. A good alternative is the universal SATA-IDE board. It allows you to connect SATA disks to the IDE and vice versa. Such a card is more expensive than simple adapters, but it gains the speed of data exchange.


