Tip 1: How to make an architectural layout
Tip 1: How to make an architectural layout
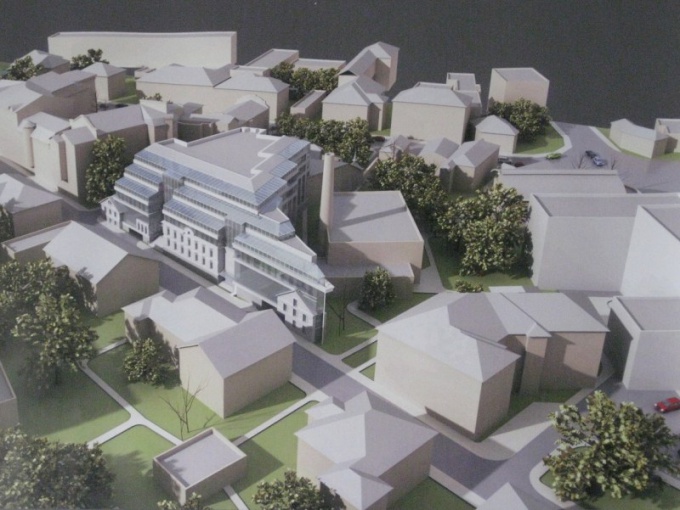
Architectural layout - a three-dimensional image of the projected architectural structure or an existing urban development area. Manufacture of such layouts - a complex, laborious and time consuming process, but if you have such qualities as accuracy and conscientiousness, you can always make an architectural layout Own hands.
You will need
- - topographic map of the area of scale 1: 1000,
- - foam board thickness of 3-5 mm,
- - glue liquid UHU,
- - cardboard is thick and thin,
- - paper, aerosol primer and paints,
- - Styrofoam,
- - foam rubber,
- - PVA glue,
- - Knife stationery or special cutter,
- - scanner,
- - a computer.
Instructions
1
To your architectural layout, reflecting the actual existing on the groundsituation, it exactly corresponded, you need a topographic map of this area. The scale of the map should be no smaller than 1: 1000-1: 2000. On this map-scheme, existing roads, coverings, vegetation with separately standing trees, as well as structures and structures must be applied. All buildings and structures must be marked in accordance with the existing conventional signs and have a mark on the number of floors. If the scheme is on paper - scan it and translate it into an electronic form.
2
Using any graphics editor, makea copy of this scheme, leaving only the necessary contours - roads, covers, flower beds, lawns, buildings and structures. Change the scale, reducing it for your task. Strictly adhere to this chosen scale in their further actions. Print a copy of the outlines and paste it on a solid sheet of cardboard - the sub-base. On the outlines of foam paper or paper cut out roads, driveways and sidewalks, paint them in gray and glue them on the base. From thin cardboard, covered with light green paint, cut out flower beds and lawns. Stick them to the places where they should be on the chart.
3
Cut out of the foam in the form of parallelepipeds of the structure and structure in accordance with the scale in which you manufacture layout. Their real approximate height you canfind out by increasing the number of floors marked on the diagram by 2.7 m - the average height of the floor for residential buildings. Cut out buildings you can paint in any colors and paste each on its place on the base, which is marked by a contour.
4
If you have a color printer, then the facades of buildings with painted entrance doors and windows, you can draw and print on paper, and then cut and paste on the foam blocks.
5
Make trees of dried flowers by covering them with greenpaint from an aerosol dispenser. They can also be made from dry branched branches, on which are dressed pieces of painted green foam rubber foam. Place them on layoute according to the scheme, using for this clay.
Tip 2: How to make a layout yourself
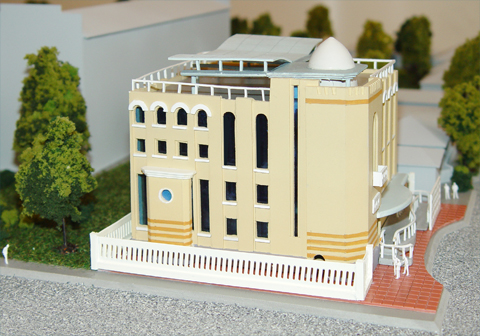
Beautiful architectural models often attractto yourself admiring glances, but very few people decide to repeat the object they liked and make a layout on their own - the work on the layout is laborious and requires large time and physical expenses. Nevertheless, the finished layout can long please your eyes and your friends' eyes, so you can try to make a simple building layout with your own hands. In this article we will tell you how to make a simple village house model from plywood and wooden slats.
Instructions
1
First, draw all the elements and detailsfuture layout on paper. The drawing should be on a scale of 1:50, and its measurements should be accurate. Calculate the size of the roof, walls, facade, the site on which the building stands, and other fragments of the layout.
2
Transfer the drawings to a thin plywood and carefully cut the details. Then, in the finished parts, cut out the window and door openings, and then grind the edges and cuts with sandpaper.
3
Wide racks for the foundation glue on the base,and then grind and sand. Doors are cut from thin plywood and lined with thin wooden slats, adjusting the size of the door leaf so that it fits snugly into the opening.
4
For windows, take a thin plexiglass and cut it into the shape and size of the window openings. Window frames are made of thin wooden slats, and then fabricate ebb and trim.
5
The skeleton of a roof and galleries make of plywood, and fromthin bend flex downspouts and gutters. Attach them to the roof, and then make a chimney and a dormer window in the attic wall. The porch can be made from wide pieces of wood.
6
Begin assembling the layout after allelements will be installed - doors, windows, and the like. Fix the roof frame on the box of the house, install the porches, glue decorative rails covering the places of the carcass bonding.
7
If desired, cut out the baluster for the porch andbalconies. Make the shape of the logs realistic by using the file and file. Grind all the fragments of the layout and cover it with decorative impregnation or varnish. Also the model can be painted with acrylic or oil paint.
8
Begin by making simple designs and continue to improve your skills on more complex buildings.
Tip 3: How to make a layout for the railway
For many people, the railway is a symbolchildhood and childhood dreams. Everyone in his childhood dreamed of having his own railway, and when this dream becomes a reality, games with the railroad and modeling on the railroad become a serious hobby, attracting not only children but also adults who spend a lot of money to equip and decorate their iron the roads. You can create some items for layout iron the roads by hand without buying the roadsx details in the store.

Instructions
1
A real railway can not be imagined without a full-fledged natural relief that surrounds it, buildings, plants, and much more. Prepare to create layout free and comfortable table.
2
On the table should be placed your railway - rail track and trains. Also make sure that you have somewhere to connect the power supply to the iron the roads. Think of a mental image of your layout, sketch on paper a sketch. Determine what elements it will consist of. Make the layout of the table, determining how to lay the rails, and what to place around them.
3
In the natural relief a special place is occupied by mountains. Make mountains with a tunnel for layout iron the roads it's very simple - you need a layout for thisknife, as well as plywood, assembly foam, sandpaper and alabaster. Think of the shape of the future mountain, and then, laying the rails on the mock-up table, make a plywood box of suitable size above the rails.
4
Inside the box, trains must pass freely. Around the box carefully apply the mounting foam, forming the outline of the mountain. Try to achieve natural and spontaneous outlines. Apply each new layer of the mountain after slightly drying the previous one.
5
Wait until the foam is completely dry, and after 24 hoursproceed to its processing. With a knife, treat the mountain, cutting off excess fragments and giving it the final form. Cut out pits and hollows, form a reliable relief.
6
Dilute alabaster in water and cover with a 3 mm layerthe whole mountain with a brush. After a few hours, paint the mountain with a gray primer from a can, the color of which coincides with the color of the real stone. Treat the surface of the mountain with sandpaper, taking off the paint in some places to create a natural wear.
7
Some fragments of the mountain are painted with a dry brush with black, white and dark green paint. So your mountain will look much more realistic.
8
Your mountain is ready - you can supplement the layout with artificial trees, small houses, artificial lawns, figures of people and animals, cars, and many other elements layout.
Tip 4: How to make an airplane layout
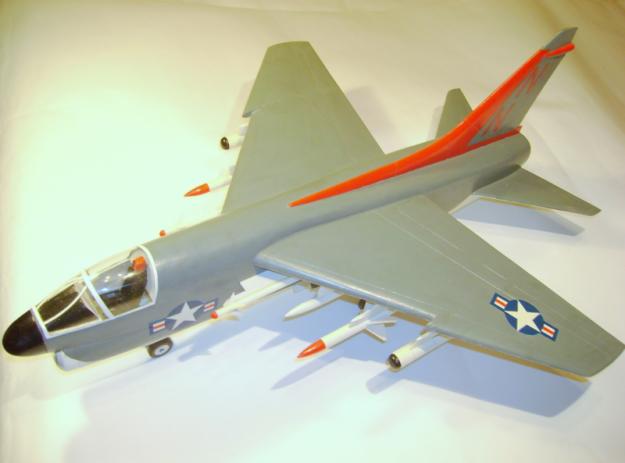
Everyone should have their own hobby. With its help, you can relax and enjoy your free time. One of the most common hobbies in recent years has been modeling. And make modelki can be absolutely of any material. Modeling will not only help you take your free time, but also will bring a lot of joy to your child.
You will need
- drawing accessories, wooden bars, tools, PVA glue, paints or varnish.
Instructions
1
First of all, decide on the type of future aircraft. Can do layout real aircraft, and you can think up yourselfits own model. Here everything depends on your imagination. First, you need to make a sketch of the future layout, that is, make a drawing by hand, which will show the future approximate view of the aircraft. After the sketch is prepared, you must proceed with the exact drawing. This is one of the most important steps, which should be treated with special care, because the correctly executed drawing is the guarantee of a high-quality manufacturing of the layout. The drawing is best done on thick paper.
2
Now you need to choose the material from whichthe layout is made. The choice is very great. The simplest version is paper or not very thick cardboard. They are good in that they are easily fastened with glue and are easily processed. From paper and cardboard, you can make almost any model. However, it is worth remembering that these materials are short-lived and can easily deteriorate from external factors. You can also take foam. It is very easy to cut it, giving it the right shape, but the foam is very crumbling and can become a source of debris, especially if the child is playing with the finished model. It is best to make a model of a plane made of wood. The tree is also easy to process and it is very durable.
3
You need to pick up several blanks forthe future layout. Of course, you can make a layout from a single piece of wood, but it's not so easy, and then there will be a lot of unnecessary pruning. It is more rational to take a few smaller brushes. Take three main brusochka, from which you will make a fuselage and two wings. You will also need small pieces of wood, from which the tail and other small parts will be made. Put the markings on the tree, according to the drawing. After this, it is necessary to carefully cut out all the blanks. When they are ready, make a preliminary fitting. Make sure that all the parts fit tightly together and no crevices or gaps are formed.
4
Now you can collect all the details together. For connection use either small carnations or glue PVA. Use the glue very carefully so as not to leave dirty spots on the surface of the layout. After connecting all the parts, make sure that they have exactly approached each other. If irregularities and misalignments are detected, they must be eliminated. After this, allow the model to dry thoroughly.
5
Now there is the last moment - decorationyour modelka. It is necessary to give free rein to one's own imagination. The layout can be carefully sanded and varnished. You can paint it. Also, the fuselage of the aircraft can be decorated with burnt inscriptions or patterns.
Tip 5: How to make a lock layout
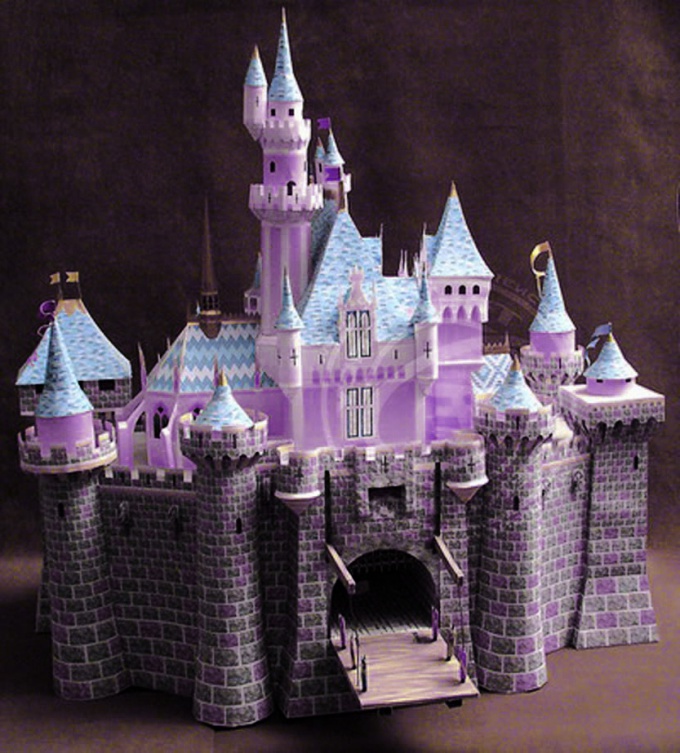
Manufacturing layouts - a very important component of children's creativity. After collecting the model, the child not only develops imagination, spatial thinking, fine motor skills, but also a detailed detailed representation of the subject (be it a ship, an airplane or a castle).
You will need
- - Cardboard;
- - glue;
- - ruler;
- - a pencil;
- - compasses;
- - scissors;
- - paints.
Instructions
1
If you and the child decided to make a layout Of the castle, then first decide on the material for creativity. You can use wood or cardboard as a "building material".
2
Choosing a tree, you will get a strong, durable, chic castle - a real occasion for pride. The very texture of your tree will give you a special color. The main disadvantage of wooden Of the castle - The complexity of cutting out details from a sheet of wood. If you are good at jigsaw, then there will be no problems.
3
Making a cardboard lock at first glance easiersimple. It is easy to cut details, it is easy to fasten them together. But the difficulties begin to arise when some fragment is not completely adhered, you need to add a little glue, a few drops fall on the front "wall" Of the castle, because of this, the paint stains there, etc. It is quite difficult to keep a faultless appearance of a product from such a fragile material. Nevertheless, for the first time it is recommended to train on the cardboard and only then go to more durable materials.
4
After determining the material, proceed todevelopment of drawings. Find in the books you like the castle or think of it yourself. You may have a question, why not first choose a model, and then raw materials for its manufacture? Everything is very simple. It is from the specifics of the material that the embodiment of your idea will depend. If you choose cardboard as raw material, you can relatively easily make rounded, bent fragments of towers. Working with wood, on the contrary, it is necessary to reduce a little the number and complexity of architectural "delights".
5
When you already have a ready idea, draw a sketch of the future product. And now directly on the sketch, indicate the approximate height, length and width Of the castle. Proceeding from the basic sizes, proceed tobuilding a more detailed and detailed drawing. It's not as difficult as it seems. Do the work in stages - from the largest to the smallest. To construct the rounded parts of the drawing, use the compasses.
6
Transfer the drawing details to the material fromwhich will be made the castle. Paint all the fragments of the product in the selected color. If you leave the painting "for later", then you risk leaving the hard-to-reach areas white or badly painted. Allow the paint to dry completely.
7
Cut the parts strictly along the contours.
8
Consistently glue all the details. Allow the glue to dry and your lock is ready.
Tip 6: How to make a car layout
Layout The car - this is a reduced copy of the vehicle,Which exactly repeats its construction. Manufacturing will require perseverance, skill and dexterity, and will also involve logical and spatial thinking in the creative process.

You will need
- - paper;
- - glue (better PVA);
- - scissors;
- - a pencil;
- - paints and brushes.
Instructions
1
Prepare the material for the layout. Typically, miniature copies of cars are made of paper and cardboard with the help of glue and scissors. In this case, the machine is assembled from separate parts, which must first be transferred to a sheet, and then cut.
2
Draw on the paper the main body parts: bottom, two sides, the roof is better to connect with the front and rear window, front and rear. Thus, we get 4 body parts. Wheels can be made as separate, and included in the composition of the side parts. If they are supposed to be screwed separately, then you need to think over the holes for the two axles to be inserted. It is desirable to mirror the right and left sides in order to maintain the equality of proportions. Do not forget to leave clearances for glue, otherwise the layout can turn out careless.
3
Cut out the details. Remember that in case of doubt, it is better to wait with the clipping of excess space, which can still come in handy, for example, for applying adhesive. Then you can not return it back.
4
Glue the parts together. Leave them for a few minutes, let the glue dry. After this time, proceed to the further work.
5
You can use an empty axis as an axisrod, on which they should be strung. Put the discs on it and then use the matches or lighters to melt the ends of the tube. Then attach them to a flat surface, resistant to high temperature, and briefly press. Get a reliable stub, which will not allow the wheels to fly off.
6
Color the resulting layout, paint the headlights,Grille, number, door handles. To create a more realistic copy, you can additionally attach rear-view mirrors and / or an antenna, for example.
Tip 7: How to make an advertising layout
Creating a layout is a major part of thethe production of advertising. It is with his help that you can determine how effective the funds used by you will be. Given the basic rules, you can create a good layout.

Instructions
1
Place one product or service on the same layout. When several products are advertised at once, the attention of the potential buyer is dissipated and the effect becomes less vivid. Looking at your advertising, the representative of the target audience should immediately understand what exactly you want to sell to him.
2
Put a header on the layout. This will simplify the perception and cause interest. As a rule, advertising headlines are of three types: in the form of a question, in the form of an appeal to the audience, in the form of an answer to a question. Do not put the title of your company as the title, if it is not well known; potential buyers will not have any associations with the product or service you are advertising.
3
Add an image to your ad layout. It should be closely related to the product that needs to be promoted in the market. Of great importance here is the color scheme. For each target audience and the scope of your product, it will have its own. It is also considered successful to place a light source on the model that would emphasize the image. It can be a sunbeam, a car headlight, etc.
4
Point to the layout and time to yourthe target audience quickly remembered the advertisement and appealed specifically to you in order to purchase the promoted goods. The memory is arranged in such a way that a person first tries to remember when he saw an advertising message and only then remembers where it was. Therefore, advertising containing such information, for example, the timing and location of the action, will be more effective.
5
Do a study, during which find out,that can catch your target audience, what difficulties it is experiencing when using a particular product. So your advertising will be different from advertising competitors. Reflect the received data in the message. It should be aimed at solving identified problems. An important point in writing a message is that it should not contain incomprehensible words.
6
Try the layout on a pre-selected part of the target audience. Take into account all her remarks and wishes. Only after this advertising will be ready and it can be placed in the media and on billboards.
Tip 8: How to make a newspaper mockup
Today's periodicals have manyeducational institutions and public organizations. The use of computer programs makes publishing simple and accessible even for non-professionals. One of the main stages of publishing is the creation of layout Newspapers. From the thoroughness of this work will depend on the external appearance and attractiveness of the publication.

Instructions
1
Use to create layout Newspapers computer application Microsoft Publisher. Install the program on the computer and start it. From the user requires the ability to understand the application menu, knowledge of working with fonts and managing colors.
2
Define the format of the future Newspapers. To make the publication solid, use the A3 format. However, if you do not have a printer of this size, use the A4 format.
3
Think in advance the name Newspapers, its logo and slogan. Such elements will give the publication more weight and solidity. Instruct the development of a graphic image to an experienced designer.
4
Open the Microsoft Publisher application andselect "Empty publications" in the menu. On the right side of the layout window, select Blank Sheet. Adjust the page orientation and its format. Set the fields. Leave the top and bottom margins as is, set the outer one at a size of 2 cm, the inner one - 1.5 cm.
5
Assign columns or columns using the guide grids. For an A4 sheet, you need five columns. For larger format Newspapers number of columns, select empirically.
6
Create text blocks on columns using the "Inscription" tool, located on the left of the toolbar.
7
Open the Insert Page dialog box by selecting "Insert" and "Page" from the menu. Set the required number of new pages, for example, three or four.
8
Slide the blocks to get them rightplacement relative to the guides. To do this, select the block using the "Shift" key and the arrow keys to control the cursor. Moving blocks can be done when the cursor looks like a four-sided arrow.
9
Go to the command "View" - "Two Pages" for viewing layout. In this case, the internal pages of the future Newspapers will be visible as a complete reversal. The basis layout Newspapers Ready.
Tip 9: How to make a color plasticine
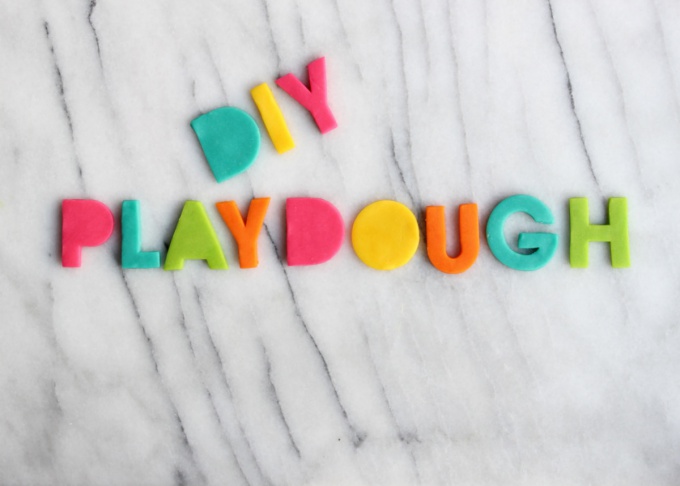
Are you afraid to buy colored plasticine because of chemistry? Make your perfectly safe colored plasticine for children. Plasticine - improve the child's motor skills, as well as it's just fun to play.
You will need
- -1 cup of flour
- -1/4 cup of salt
- -2 tablespoons of tartar (mono-tartrate)
- -1 cup of water
- -2 tablespoons vegetable oil
- -Food colorings
Instructions
1
Mix the flour, salt, tartar and food color in a medium saucepan. Add water, butter and mix well.
2
Put the pan on the stove for medium heat. Continue stirring until the color becomes saturated. In your plasticine may not appear large lumps, it is a sign that it's time to clean up from the fire.
3
The resulting mixture is put in a refrigerator for a coupleHours. After it is cooled, mix it. Do the same steps with a different color of food coloring. Your safe clay is ready. Enjoy a fun game!

Tip 10: What is the log layout
Whatever the journal, in the printingperformance or in the form of an Internet resource, its creation is impossible without a layout. Correct design promotes a better perception by readers of the information published in the journal.

In order to accurately answer the question in the title, it is necessary to specify which journal is in question - a printed one (on paper) or an Internet resource, since their layouts differ significantly from each other.
Traditional magazine. Production starts with a layout
A log layout is a page graphic(mainly) the plan of the issue number, which takes into account all elements of design and text execution. If the textual and illustrative filling of the next issue of the journal begins with an editorial thematic plan, then the immediate process of producing each issue of the publication is from the layout. The editorial version (or the executive secretary of the editorial office), as a rule, has already received texts and pictures from the correspondents of the edition, they have passed editorial editing and proofreading, they have been coordinated by editors of departments, editor-in-chief . Creating a mock-up of the magazine, the issuing editor not only marks which pages the material will be published on, but also how the illustrations for this publication will be placed, which images or infographics will have dimensions. When prototyping, we take into account both the size of the text and its genre: for example, in an interview, questions and answers are necessarily made in a different typeface, so that the reader can easily navigate, which of the interlocutors owns this or that phrase, a replica. The font execution of headings, sub-headings, headings, signatures to pictures and texts is separately marked.The use of different types and font sizes performs the excretory function.Using different fonts on one pageallows and divides two publications, in particular, a small note is not lost on the background of an analytical article, if it differs in text font. As a rule, notes are written in this way, which are directly related to the topic of the article, although there are exceptions. Modern standards for the design of printed publications recommend not to get carried away using a large number of fonts and use 2-3 headsets.
The design of the magazine can provide for the use of rulers and frames as excretory-separating elements, their application, type and size are also reflected in the layout.Each printed edition has mandatory elements - headers, headings, output data, and in the magazine - and the table of contents. These elements are also marked in the layout.
Why do you need an online magazine layout?
Creating your own online magazine, inIn particular, on the livejournal.com site, newcomers are puzzled when the resource offers them to choose not only the theme of the magazine's design, including the background color and often the title image, but also the layout of the magazine. The mock-up of the online magazine (blog) differs significantly from the above printed document and is a division of the magazine's page into the main field where the blogger's publications will be posted and side-bars. The Internet Journal can contain one or more side-bars. As the name implies, the side-bar is located on the side, and if it is in the magazine alone, it can be either on the right or on the left. In some cases it is possible to place a side-bar at the top or bottom of the page. If the blogger believes that he needs two side-bars, they will be placed to the left and to the right of the working field of the magazine. The main elements of the magazine are placed in side-bars: a tag cloud (tags) that allow the magazine reader to find publications on a particular topic, most often it is made in the form of a calendar, and if you remember when approximately a certain material was published, you will find it much faster with this option than if you flip through the entire magazine.) Often the owners of Internet magazines place in the side-bars text and illustrative banners, including advertising ones. The layout of font sets and font sizes in Internet logs in the layout is not specified, these options are set once when choosing a template (template) for processing a blog. Similarly, sharpened and templates on the engines of Joomla and WordPress, which allows bloggers who do not have knowledge in the field of production of printed publications, successfully create their own Internet resources, design them and post the content in their minds.Tip 11: How to make an active volcano mockup
To explain visually how the eruption of the volcano occurs, it is possible to make its model of the house. This is a good lesson for children and their parents during a vacation or illness.
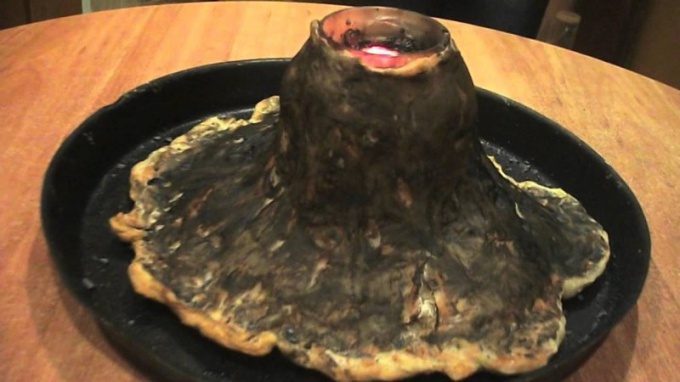
Books with a detailed description of what and howoccurs at the time of the eruption of this volcano, are very interesting, and educational films on this topic are also necessary. But the very fact that at home can make an active model of the volcano, is of interest in children and adults. In order to make a volcano at home, you need a large glass jar, or a bottle with a wide enough throat to represent the crater. A narrow neck is likely to cause the jet of lava to blow up, staining everything around, for a believable run-off along the slopes of the mountain it is better to use a jar. Around this vessel it is necessary to build a semblance of a mountain from improvised materials, it is also desirable that the material withstood more than one eruption, then it will be possible to demonstrate the experience more than once, and later carry the mock-up to the school or give it to a mug. Use to create a relief around the volcano can be gypsum, self-curing plastic, polymer clay, plasticine, papier-mache or salted dough. To form a believable relief, you need a board on which the layout will be located. In the process of modeling, it is necessary to depict ridges and canals through which hot lava will flow, at the foot, you can arrange even a couple of trees for a more harmonious picture. The layout should dry well, especially for gypsum and papier-mache models. Papier-mache after drying and coloring will need to be covered with several layers of varnish, so that the first eruption does not wash out the paint on it and cause it to lose its shape. Paint colors can be used any. Do not wash out with water and do not require additional coating on top of oil paint and acrylic, but oil paints for a long time to dry. To prepare the composition, with which the eruption is arranged, take a tablespoon of liquid soap or dishwashing detergent and mix with a tablespoon of baking soda. There you also need to put a red or orange food color, so that the foam looks believable and resembles a red-hot lava. After the mixture is placed in a bottle or jar, it is possible to start the eruption. For this, a quarter of a glass of ordinary white vinegar is poured there at an average speed. After the addition of vinegar, the neck of the volcano can not be closed, a bottle or a bank may explode as a result. The proportions of the mixture for indoor use are better reduced, they are given with the calculation for a crater made of a three-liter jar. When the eruption is over, the layout of the volcano needs to be wiped off from the soda marks left and removed until next use.
Several ways to make a volcano


