Tip 1: How to Make a Hare from Beads
Tip 1: How to Make a Hare from Beads
A bunny figure can be weaved in techniqueparallel weaving or do three-dimensional. This is one of the simplest handicrafts, so often begin training beginners with weaving rabbit. It can be attached to a ring and used as a key ring or placed on a shelf.

Hare in the technique of parallel weaving
Prepare the necessary materials for the job. You will need: - beads of white, pink color, - 2 beads of black color, - 1 bead of red color, - cutters. Cut a piece of wire for beadwork in length of 0.5 m. Start the weaving from the head. To weave the eye, string on the wire 8 beads, arrange them in the middle of the segment. Pass one of the ends through the first bead and tighten. At one end of the wire, string 10 beads of white and thread the same tip through the third bead from the beginning of the set. Wrap the wire and form a loop for the second ear. At the left end, string 4 beads and stretch the right side through them. Tighten the row. In the next, make the eyes of the bunny, string 1 white, 1 black, 1 white again, 1 black and 1 white bead and drag the second end of the wire through them. In the next row, weave the cheeks and spout. To do this, string 1 white, 1 pink, 1 red, 1 pink and 1 white bead onto the left end of wire 1, pull the other end through them and pull the wire. In the last row for the formation of the head, type 3 beads of white and go to the weaving of the trunk and paws of the hare. Put on the wire 4 beads of white color, in the next row weave the front legs of the hare in the same way as the ears. Type 4 beads on one side of the body and thread the same end of the wire through the first. Tighten the eyelet. On the other side of the trunk, make the second foot in the same way. Next continue to weave the trunk in the technique of parallel weaving. String on the wire 2 beads of white, 1 pink and again 2 white. Pull the second end of the wire through the entire row and pull it. Then, type 2 beads of white, 2 pink and 2 white. In the next row, reduce the number of beads. Dial 2 white, 1 pink and again 2 white beads. Then string 4 white beads and begin to weave the lower hare paws. Make them similar to the front, then dial 3 beads of white color, pass through them the second end of the wire and finish the bunny in a parallel technique.Bulky hare
To make this craft, you alsoneed beads of white, pink and black, wire for beadwork and wire cutters. And to give shape and stability to the hare, you will also need a thin line. Cut off a piece of wire 80 cm long in the technique of voluminous weaving make 2 tiers. The upper will form the back, and the lower one - the belly of the bunny. String on the wire 1 pink and 2 white beads. Place them in the middle of a piece of wire. Pass the second tip through 2 white beads and tighten. In the second row for the top tier (back of the hare), type 5 beads of white color and pass through them the second tip of the wire. And for the lower tier string 3 beads also white and stretch the second side of the wire through them. In the remaining rows, wedge in the same way. In the third row for the upper tier, string 2 white, 1 black, 3 white, 1 black and 2 white beads. For the bottom 4 beads of a white shade. Further, whip only beads of white color. In the fourth row, type 10 and 3 beads. In the fifth, weave the upper tier of 9 elements, but do not tighten the wire tightly. Cut off 2 additional pieces of wire and pass them through the third and fourth beads on each side. On these pieces you will later weave the ears of the bunny. The main piece of wire is tightened and continue the weaving of the lower tier, for which dial 2 beads. Next go to the weaving of the trunk. In the sixth row, type 6 beads in each tier. In the seventh - 5 and 8 respectively. In the eighth for the upper tier, string 5 beads, and for the bottom, type 10 pieces, but do not tighten the wire. Cut two more pieces of wire each 20 cm long and thread them through the third and fourth beads on each side. Tighten the wire. In the ninth and tenth rows, type 6 and 12 beads in each. In the eleventh for the upper tier, type 5 pieces, and for the bottom - 11 beads, but do not tighten the wire and pass through the third and fourth beads on each side one piece of wire for further weaving of the hind legs. In the next 12th row, dial 3 and 8 beads, in the 13th - 2 and 4, in the next weave only the upper tier of the two beads and make a tail of one bead. We will finish the torso of the hare. Cut the wire, twist and hide the tail inside the figurine. In the technique of parallel weaving weave the hare's paws and ears. To give the bunny stability and shape, sew his head and trunk with a thin fishing line.Tip 2: How to Make a Hare from Paper
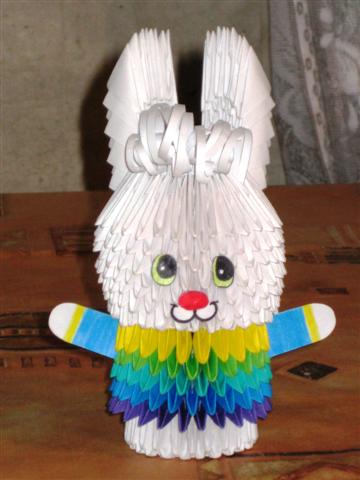
Unusual paper crafts may be of interesteven experienced in the creative pursuits of man, especially if they are quite complex and unusual. As an uneasy, but interesting in the manufacture and impressive in the finished form of crafts, we suggest you make your own paper a hare of a large number of individual small modules from paper. Having mastered the method of folding a hare from paper triangles, you can collect any other shapes using the same technique.

Instructions
1
Prepare more pieces paper - as a preform for the modules can serve old scribbled sheets of notebooks and notebooks, clippings from newspapers and magazines. Size sheet paper for one module should be approximately 7 by 5 mm.
2
Fold the sheet in half and bend the edges to the center to make a corner. Turn the workpiece over and fold the corners again, and then bend the bottom of the figure from the bottom up to get a triangle.
3
Fold the triangle in half, curved inward. Make a few more of these triangles - you'll need many modules to build a shape.
4
Look closely at the modules - you will see that theyeasily put on each other. Thus, from a triangular module you can collect almost any sculpture. Fasten the first two triangles to the third, placing it above them. Continue to connect the modules in this way, forming a chain.
5
Close the chain of modules, fixing it with one moretriangle. Continue to build up the chain of modules, adding a new series of modules, putting them on each other and forming new circles. Having understood the principle of assembling concentric circles, try to increase the shapes of the figure, creating thickenings and additional elements on the outer walls.
6
Collecting from the modules a figure a hare, do not forget to form the ears and the muzzle out of the modules. Adapted, you can connect the imagination and modify the shapes and their outlines at will.
Tip 3: How to make Easter bunny earrings
Lovely earrings with the rabbit will give tenderness and modernity to the young lady.

You will need
- - plastic Fimo "(blue, white, green, pink and black)
- - scalpel;
- - toothpick;
- - accessories;
Instructions
1
Roll from the white plastic oval in the form of eggs, two ears in the form of a petal with one blunt end (for ease of gluing) and a small ball-tail.

2
Glue the ears and tail to the body of the rabbit.

3
Make two small black balls (eyes) andone small oval of pink color (spout). Attach the rabbit to the face of the rabbit with glue eye and nose. Form a small bow from a small strip and two triangles. Prick a bow to the rabbit's ears.

4
Make flowers by rolling small balls of blue and pink. Make the grass: roll a thin band of green plastic and cut it into strips, sharpening the edges on one side.

5
Decorate the rabbits. Glue the grass and flowers from below on the tummy. Bake should be for 10 minutes at a temperature of 110 ° C.

Tip 4: How to make a cat out of beads
Animals from Beads almost do not perform a functional role, but can serve as an original decoration for the key fob or phone. To such lovely knick-knacks also belongs a cat from Beads, made on elastic, wire-holding wire.

Instructions
1
Type three black beads in the middle of a piece of wire 50-60 cm long. Pass through the two end beads with the other end so that a triangle of parallel beads is formed.
2
Bring another sixteen beads to one endwire. Another pass them in pairs, changing direction. As a result, a strip of several rows of closely fitting beads should be obtained. Tighten the wire tightly enough so that the rows do not separate, but do not overtighten so that it does not tear. This is the tail of a cat.
3
The number of beads in the following rows: 5-5-4-3-2-1-5. This is the back of the back and the back pair of cat paws. Hide the ends of the wire and cut.
4
The middle part weave from such rows: 5-3-3. Separately weave each eye from two rows (1-2) and the part with the head, chest and front paws: the first row is six black beads, the second row is one black, one yellow, two black, one yellow, one black. The third and further rows are only from black beads: 6-4-4-3-3-2-2-2-2-5. Hide the ends of the wire and cut.
5
Connect the parts using a thread or wire. The ends are hidden inside the beads. Tie the ear of the jewelry cable to the ear.
Tip 5: How to make a Christmas tree-spring of beads
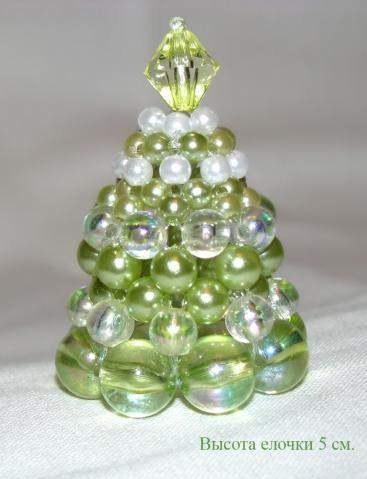
What kind of fir-tree can not you see before the Newyear! Masters and craftsmen sew them from various fabrics, mold them from clay, cut them out of wood, form glass, metal, plastic and many other diverse materials. Very elegant and shiny Christmas trees are obtained from beads.

You will need
- - wire that will hold the shape (not too soft)
- - beads or beads of green color
Instructions
1
To create such a Christmas tree, we will not usetechnique of weaving, and the technique of stringing beads or beads on a wire base. Accordingly, we need wire and a scattering of green beads or beads. If there are no greens, then you can use any, because the Christmas trees in the outfits become so colorful.

2
Wire can be obtained from the old calendar. In calendars of small sizes, the spring is thin enough and is not very soft, just keeps the shape. And it is not necessary to straighten this spring into a smooth string, you can string beads onto the bending metal thread and it will turn out to be fun too. In the picture, complex Christmas trees made using the technology of weaving from beads, this can be learned at the next stage.

3
We bend our wire in the form of a conicalsprings from a large turn to a smaller one. Leave the tip for the top of the head. For the top of the head we use the most remarkable bright bead. We bend the tail and hide it inside the bead. Now string the prepared beads. Through certain distances we string on 1-2 beads-beads of another color or even size - these are toys on the Christmas tree. So we fill the whole spring. Now bend the tail. The work is completed. Use it as a small New Year's souvenir.


