Tip 1: Host: types, care, landing
Tip 1: Host: types, care, landing
Hosta is an attractive deciduous plant,malotrebovatelnoe to care - perfectly decorate a personal plot. This native is from the Far East. There are many species known for their unusual shape, size and color of leaves.

Types of hosts
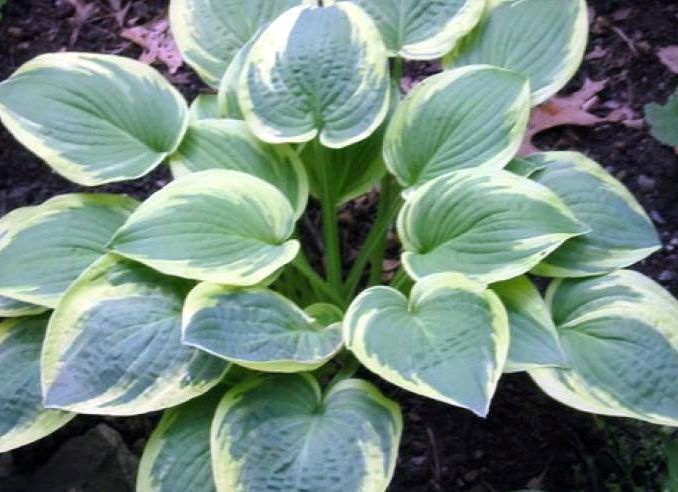
All kinds of hosts, its old name is funky, veryDecorative, some please gardeners with beautiful flowers. Her stem is short, leaves on long cuttings are collected in thick rosettes. There are varieties with flat gray-green leaves, dissected by deep veins. Other species have leaves with bright silver-green stripes and mottled pattern. Flowers of different colors - white, lilac, purple, violet - are collected in a multicolor brush.
The most interesting is the hostwhite-laced, up to 85 cm high. It has broad-oval, dark green leaves with a silvery-white border. In the flower brush 20-25 pale-purple bells-buds are collected. Blossoms since the middle of June.
Her "girlfriend" - a lanceolate host, also veryattractive plant. The height of the stem is 25-30 cm, the leaves are elongated, bright green. Flowers are light purple, in the brush there are 10-12 pieces. Host ovoid - high, up to 80 cm plant with leaves of broad-ovoid form. The flowers in the brush are 15-20, the perianth is lilac-bluish.
Planting and care
All hosts like open solar areas, butcan grow in the shade. Poorly tolerated waterlogging, in damp places leaves rot and die. Dredging soils for their planting to a depth of 30-40 cm, as the plant has powerful roots deep in the depths.
Care of plants is simple, consists in loosening,watering, weed removal. Perennials are unpretentious, but responsive to feeding. Comprehensive fertilizers for flowers are suitable. After applying mineral fertilizers, the soil around the plants is mulched with humus.
The host multiplies in the climate of the middle bandRussia by dividing the bush, the plants are planted in the spring or in August in the fossa 30x30 cm. The host for a little bit is buried, the leaves are not cut off, they are left until the spring, the soil is mulched in the flower bed with dry peat and mown grass. Together with mulch, the earth is sprinkled with tobacco dust from pests. Landings are covered with lapnika or nonwovens. At one place the host can grow 8-10 years.
Tip 2: Host is a lover of the shadow
Arranging a flower garden in the garden, problems with the choiceplants for well-lit, sunny areas, as a rule, no. And what to do with those areas where there is always a shadow (from trees, bushes, fences)? Not so many plants prefer shaded areas. One of these plants came to us from East Asia - it's a host. This perennial plant with ordinary-looking flowers in the form of bells and leaves of amazing beauty. They are green, salad, bluish-gray, golden yellow, almost white, spotted and striped.
The leaves are heart-shaped, round in shape,narrow and long, large and small. Depending on the variety, the host can grow in the form of a huge fountain of foliage, and maybe a slightly noticeable bush. But any kind of hosts will necessarily adorn your garden, creating the charm and mystery of their distant homeland.
The best time to plant hosts is spring orautumn. Spring should be planted until the leaves appear on the plant, and in the fall - in early September, so that before the onset of cold weather the plant managed to take root. These methods of planting are suitable for reproduction by rhizomes. But you can plant the host and seeds. With this method of reproduction, it is necessary to grow seedlings (in glasses or flower pots). Further planting is carried out as usual in spring or autumn.
Choosing a place for landing hosts, you need to considersome features of different species of this plant. So, hosts with green leaves prefer a shadow, and with mottled and light leaves need sunlight. Although in the heat of their need to pritenyat from direct sunlight.
The soil can be both acidic and alkaline, butnecessarily light, fertilized to allow good air flow. Since the roots of the hosts grow horizontally, the fossa for planting should be fairly wide, and deep into - not less than 30 cm. The pit should be filled with a mixture of compost soil, which has reparted manure, peat and sand.
Care of the plant is simple. Since in the homeland hosts grow along the banks of streams, rivers, they need moisture. Here regular irrigation is important, and in the evening, bushes can be irrigated from above on the leaves. Loosening under the bushes of the plant should be done very carefully, because the roots are close to the surface. And it's best to use mulching instead of loosening. So the moisture in the soil lasts longer, and the roots are not damaged.
Host is practically not exposed to anyillnesses, but there are pests in it - it's slugs. They damage the leaves, which makes the plant unattractive. To get rid of slugs help mulching. But the mulch should not be peat, but small gravel, crushed shells or chips. On such a stingy surface slugs will walk uncomfortably.
Tip 3: How to grow a beautiful peony bush
Growing pions in the garden can be called a tradition of gardeners. These magnificent flowers adorn the garden not only with its magnificent multicolored flowers, but also with the carved greens of the leaves.

Peonies are one of the most favorite colors of manygardeners. To grow a beautiful bush, you need to observe some rules when planting and nursing. First of all, it is necessary, of course, to determine the place of planting. Peonies planted on windless bright areas. The shadow for these plants is absolutely not suitable, because in such conditions they will not bloom. These plants do not like waterlogged soils. On them they will get wet and may die.
Before planting, it is desirable to make a compost or humus in the pit. Peonies love fertile soil, but fresh manure can not be introduced, it can be the pathogens of various diseases.
In order for the pion root system to develop well,they are planted in a pit, the diameter of which should be about 60 cm. The depth of the pit is the same. If several peonies are planted nearby, the distance between them is at least 1 m, so that in the future the plants do not interfere with each other.
In spring, the plants are planted before they go togrowth of the kidney. A later spring planting may not be very successful, not all plants can survive. Planting work is carried out in autumn from mid-August to September.
Care of peonies
Care of the peonies is standard. The soil is loosened, not giving a dry crust, watered, and the weeds are removed. In the evening, with the help of garden sprayers, you can spend foliar feeding, but under the root of the plant, in the first 2 years of life after planting, you can not fertilize. Water the pions quite abundantly. On the leaves and flowers, these plants can not be watered, otherwise they can develop fungal diseases.
In order to create large flowers on pions,the side buds are removed, leaving only the central one. All the strength of the plant will start up on the development of this bud. If the goal is to achieve a longer flowering of the bush, you should remove the central bud, and all the others should not be touched.
In the garden peonies look great next to plants such as oak wood, cuff, blue host, chif.
Tip 4: Host: Planting and Care
Hosta is a herbaceous perennial fromfamily of asparagus. The plant is unpretentious, cold-resistant and drought-resistant, grows well in the shade and is used in landscape design to create a background for other plants.

Landing hosts. To plant this plant you need to choosebreathable, fertile and light soil. If there is clay soil on the site, then the hosts need to add peat, sand and humus to the landing sites. If there is sandy soil on the site, then it is necessary to add clay and organic substances. If there is a lot of water on the plot, drainage is necessary.
- It is necessary to dig a pit 20-40 cm deep.
- Depending on the size of the hosts, they should be planted at a certain distance, small 15 cm from each other, between the middle 50 cm, and large to 90 cm.
- Before planting the seedling hosts, the roots should be lowered for half an hour in cold water with the addition of a drug to stimulate root growth to protect against viral diseases.
- If planting is carried out the purchased plant, then it should be planted in a pit, in the center of which there is a mound to evenly distribute the roots.
- Then the plant is sprinkled with soil.
- After landing, the host needs to water and mulch the soil around the plant.
Care of the host. In order for the host to grow well it is necessaryto feed. This should be done three times a year using humus or compost. The host should not be transplanted, she likes to grow in one place, only every 5 years it needs to be divided. Water the plant should be in the early morning under the root, as the leaves from moisture begin to deteriorate.
Tip 5: Lilies: planting and outdoor care
If you decide to plant lilies on your site,then your acquaintance will begin even on the counter of the store. The best solution is to purchase bulbs of lilies in a specialized store or at flower shows from collectors who are often professionals in growing healthy plants.

How to choose good lily bulbs
In any case, wherever you try to purchaselilies, it is necessary to pay special attention to the selection of full-fledged bulbs of plants. Lily bulbs should be chosen as large as possible, not over-dried, with fleshy scales. Unacceptable signs of disease and mechanical damage to any part of the bulb, so very carefully examine its scales, roots and the bottom.
Purchase of lily bulbs is best to care for in early spring or autumn, before planting them in the ground. The deadline for planting bulbs in the fall in autumn is the end of October, in spring - the beginning of May.
If lilies are purchased in advance, then storebulbs can be packaged with perforations, in a dark cool place, at temperatures not lower than 4 ° C, for example, in the lower section of the refrigerator. The storage area must be dry, with sufficient air intake. In such conditions, the bulb of the lily may begin to grow. In this case, you need to open the package and make sure that the young stem is not deformed.
Rules of planting lilies

A pleasant feature of growing lilies istheir ability to grow and fully develop in one place up to five years. The main thing is to choose a suitable place for a flower in the garden. Lilies - lovers of moderately moist places in the penumbra with well-drained soil.
The most favorable period for planting liliesIt occurs at the end of September, when the plant is still at rest. The pre-plant measures include the removal of damaged scales, shortening the elongated roots and processing the bulbs with a systemic fungicide. Lilies are very responsive to the use of growth stimulants, so they can also be used safely. For example, firstly, the bulbs are treated with a 0.2% baseazol solution for 20 minutes, dried and aged for an hour in epin.
Planting of lilies is made in pits with a diameter of up to 40cm, if the bulbs are large, to a depth of at least 15 cm. At the bottom of the hole, prepare a good drainage in advance, it can be a layer of gravel or sand up to 5 cm. Top a layer of soil, also optimally up to 5 cm.
Lily bulbs put one in each suchplanting pit and, compacting the earth around the plant, fill them so that the soil completely covers the top of the bulb. Do not forget that the optimal depth of the bulb landing is 15 cm. Then, note the place of planting of the lily, forming a circle around the landing pit on the surface of the earth, and pour a handful of granulated fertilizers.
Care for the lily: fertilizer
On the growth of bulbous species of flower plants, inincluding lilies, is beneficially affected by fertilizing with mineral fertilizers. Many gardeners, keen on breeding lilies, recommend the use of granular fertilizers for bulbous flowers, the composition of which is specifically designed for this group of plants.
Fertilize the lily should be twice a year. In autumn in October, fertilizing is carried out with fertilizers that do not contain nitrogen, and in the spring, as soon as young leaflets appear on the soil surface - fertilizers with nitrogen. Do not use organic fertilizers, excess organic matter in the soil contributes to the infection of lilies with fungal diseases, but the introduction of wood ash into the soil will have the opposite effect. For the prevention of diseases and the spread of pests it is recommended to spray up to three times a year a lily with a 1% solution of the Bordeaux mixture.
Secrets of successful care for lilies

In the care of lilies in most of its unpretentious, but still there are several secrets that you need to know when embarking on the cultivation of this beautiful plant.
The place of planting of lilies is best chosen on the sitesuch that the lower part of the stem of the plant is in shadow. This will avoid overheating and drying of the land around the bulbs. To this end, you can plant lilies in compositions with stunted or medium-sized flower crops. Lilies are especially well combined in such plantings with daylilies, hosts, nivyanikami and bells.
Care for lilies during flowering is fromsmall watering. If the flowering period coincided with the drought, it is necessary to fill the area with flowers abundantly with water several times to avoid water depletion of the bulbs. After the lilies bloom, watering can be completely stopped.
When cutting lilies into a bouquet, be sure to leavepart of the stem with leaves above the ground. This will allow the onion to continue its full development. The cut must be done with a scythe so that the rainwater does not get inside the stem and does not cause its rotting. In autumn, cut off all the shoots of the lilies, leaving stems up to 20 cm high.
In order that the lilies are not affected in winter fromfrost, they must be hidden. Use for shelter you can sawdust, film, agrovolokno, lapnik and other materials. The main thing is to check that the soil and material are completely dry. In the spring after the disappearance of the threat of frost, the shelter needs to be removed in order to ensure the development of normal undeformed shoots of lilies.
Tip 6: What to put in the country
In the country you can plant fruit, ornamental trees and shrubs. Flowers, berry crops here will also be welcome guests. Lovers of the unusual can plant exotic species of cucumbers, tomatoes.
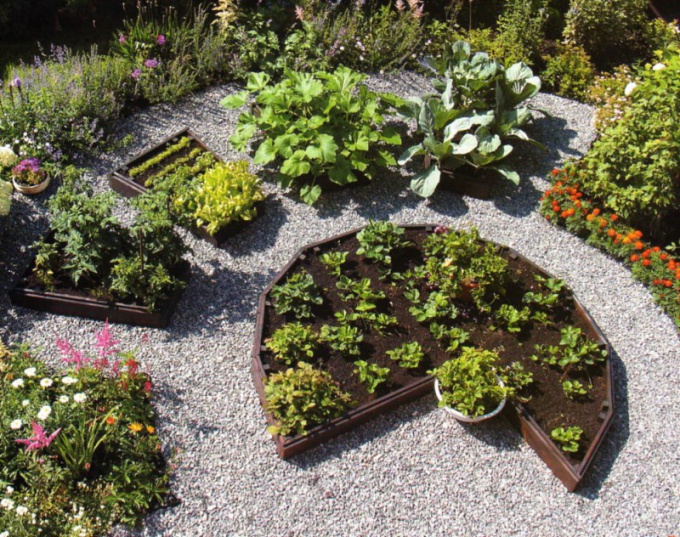
Happy owners of a summer residence canto put on it everything that the soul desires. However, to make every plant feel great, you must first make a plan, think over what and where to plant.


