Tip 1: How to apply evenly dark varnish
Tip 1: How to apply evenly dark varnish
Blue, black, purple, brown and othersDark shades of varnish are in fashion today. However, not all can apply them neatly. Flows and lumens on the dark manicure are particularly noticeable. To avoid mistakes, take your time and master some unmistakable techniques of coloring nails. Following them, you can make a beautiful manicure of a professional level.

The right choice of varnishes
To manicure turned out beautiful, rightpick up the varnishes. It is best to use dark glossy enamels, which are densely laid down already in one layer. Matte varnishes emphasize the irregularities of the nails, and translucent shades are very difficult to apply evenly. If you like varnishes with sparkles, choose a small shimmer. A large glitter requires skills in applying, besides, it requires an obligatory colored substrate. To help the lacquer to lie evenly the leveling base will help. On the even nails it is applied in one layer. If the plates are covered with grooves, apply the base in two layers, drying well each.Very uneven nails can be ground with a special file or polishing bar.
The art of applying dark lacquer
Before you start the manicure, prepareall necessary - varnish, base, top coat. Keep a special stick at the ready for removing lacquer stains or cotton swabs and rinsing. Align the length of the nails and shape them. Do not forget to remove the cuticle and burrs. Remember that the dark color attracts increased attention to the hands. To enamel become homogeneous, flip the bottle and rub it between the palms. Do not shake the lacquer - it can form bubbles that will spoil the manicure. Apply the base on the nails and dry it. Dip the brush into the vial with a varnish, lightly wipe it off the neck. Lacquer on the brush should be so much that it covers the nails, leaving no strips, but also not flowing on the rollers and cuticles. Place the brush in the center of the plate, closer to the base. Carefully push it to the cuticle, and then lead to the tip of the nail. Dip the brush into the lacquer again and in the same way paint the sides of the plate. If streaks are formed, wipe them with a cotton swab soaked in a nail polish remover. Having painted a fingernail, spend brush on its end, fixing color. This method is very important when working with dark varnishes, otherwise within a few hours you will be able to see the white stripes along the edge of the plates.Thickened lacquer will not lie flat. If the enamel has become too thick, dilute it with a special liquid.Begin painting with the little finger of the left hand andmove to the little finger of the right. When finished, let the varnish dry and make up the second layer of nails. Try to keep it flat on top of the first one. If you go beyond the boundaries, after drying will be visible lighter areas. Check if the nails are translucent. If visible strips, apply a third layer of varnish. Fix the manicure with a thick layer of topcoat with the effect of drying. Such a top will hide possible errors and will not allow the varnish to crawl and shear. The top coat can be updated daily, then the manicure will always look fresh.
Tip 2: How to make a watermelon manicure
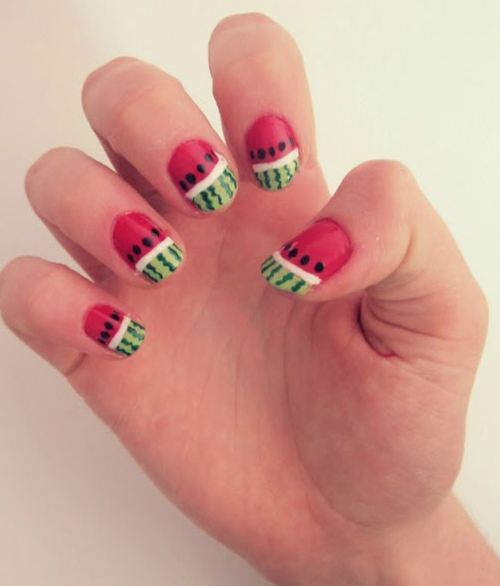
Bright watermelon colors are always in vogue. This is a bright and bold manicure that will give the owner from the crowd. Decorate your nails with a bright watermelon manicure, which will please everyone's eye.

You will need
- -Base for nails
- -Wish
- -Green lacquer
- -Vark pink or red lacquer
- -Black lacquer
- -Dark green varnish
- -White lacquer
- -Water-repellent liquid for covering the nail after drawing the picture
Instructions
1
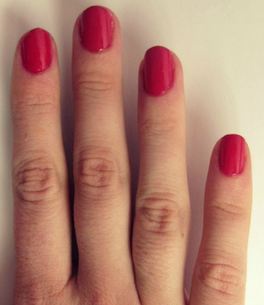
Using the nail file, align the nail shape insemicircle. Apply a protective base and allow the nail to dry. Then, cover all the nails with a uniform layer of red lacquer and wait until the nails completely dry.

2
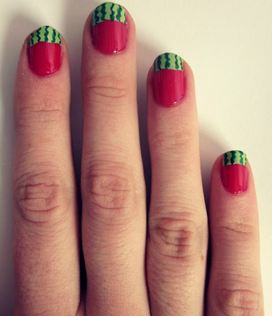
With a bright green varnish, draw a strip (clearly repeating the contour of the nail) in the upper part. The width of the strip depends on your personal preference.

3
Using a toothpick or a thin brush with a dark green varnish, draw a wavy strip on top of the green layer.

4
Wait until the nails dry. With a fine brush with a white lacquer, draw a smooth strip between the joints of red and green lacquers. With black lacquer draw the dots after the white line.

5
Dry your nails thoroughly. Cover them with a water-repellent liquid so that the pattern becomes resistant.

Tip 3: How to draw a starry sky on white shoes
Unusual popularity has a variety of unusual shoes. Someone draws roses, animals. The starry sky looks great on any product.

You will need
- -Pair of white rag-shoes
- -Sponge
- -Old toothbrush
- - Fine brush
- -Scotch
- -Scissors
- -Water
- -Acrylic paints
Instructions
1
Using Scotch tape, cover the sole, shoelaces and the inside of the shoe. This will help prevent paint from appearing in undesirable locations.

2
Put the sponge in a dark blue acrylic paint and gently sponge all over the shoe. If you use more than one color, mix them with patting movements.

3
Put the violet paint in the remaining white places. Use a sponge or a toothbrush.

4
Use pathetic movements to apply a small amount of pink paint.

5
Draw a white paint on the sponge and gently cover the entire shoe, distribute it evenly.

6
Take a white cotton swab and gently, apply a white paint. It will be the stars.

7
Completely dry the boot, using a liquid to remove varnish, remove the paint from excess places.

8
Dip the toothbrush in white paint and lightly touching the bristles, draw small stars.

9
Repeat step 8 until the number of stars has reached the desired result. You can also draw falling and shining stars.

10
Dry your shoes. Done!

Tip 4: How to decapitate a casket
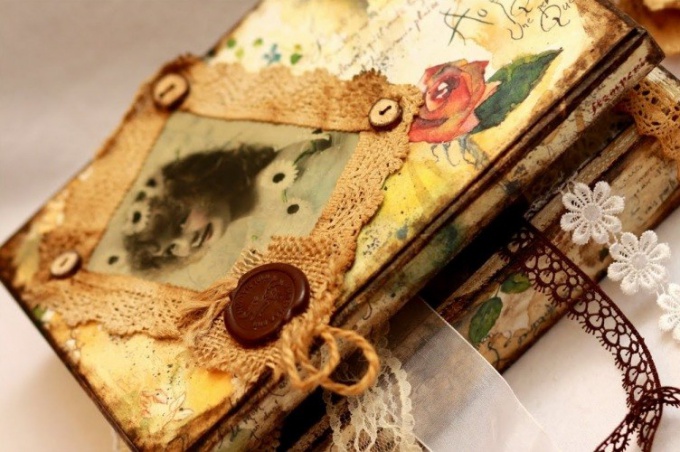
The technique of decoupage is known since the XV century. Modern craftsmen actively use it when decorating a variety of objects. The advantage of the technology is that it is able to decorate any surface, regardless of the material of manufacture. Caskets in the technique of decoupage is appropriate in any style, whether it is country, modern or classic.

You will need
- - Wooden cask stock;
- - a set of synthetic brushes;
- - Acrylic paint;
- - Toothbrush;
- - A candle;
- - Acrylic enamel of white color;
- - PVA glue;
- - patina or brown oil paint;
- - acrylic lacquer;
- - a sponge;
- - double sided tape;
- - rice paper;
- - lace;
- - buttons;
- - the cloth.
Instructions
1
Using a shallow skin, treat the surfaces of the future casket and paint it in brown with acrylic paint. All further work should be carried out only after completely drying.
2
Take the candle and gently rub out all the faces and corners of the box. Remove the excess with an old toothbrush.
3
Surfaces of the box are covered with white acrylic enamel and allow to dry completely.
4
With a metal scraper or kitchen brush, clean the paint where the candle was applied.
5
Remove excess paint from the surface.
6
Decoration will require a decoupage map and rice paper, which are chosen based on the style and motives of the future product.
7
Glue PVA dilute with water in a ratio of 1: 3. The surface of the box, on which the motives will be pasted, will be glued with glue. To perform the work it is better to use a synthetic brush.
8
Napkin motif or rice paper neatlyApply to a surface and plentifully grease with the dissolved glue PVA. When performing the work, carefully align the image with a brush and fingers, so that no creases appear. If you have applied too much glue, remove the excess with a brush. Allow the box to dry.
9
Sponge with oil paint or special patina wipe faces and corners.
10
Brush with acrylic lacquer. Leave the products to dry for 15-20 hours.
11
At the bottom, glue the double-sided adhesive tape. Cut out a piece of fabric that will fit the size of the bottom of the box. Moisten the edges in the PVA glue and allow to dry, attach the cloth to the double-sided adhesive tape and press firmly.
12
Lace and buttons will be used for decoration. To artificially age the lace and get a pleasant cream or beige color, dilute the coffee, add cinnamon or a few drops of vanilla essence. Dip into the capacity of the lace.
13
Preheat the oven to 90-100 degrees Celsius. The pan is spread out with several layers of paper towels and spread out the lace. "Bake" spend for half an hour.
14
If the lace will lie flat, it will color evenly. If you lay a fold and slightly crumple it, in places of creases the color will be darker.
15
Attractive "old" divorce can be obtained by dipping lace in a weak solution of potassium permanganate. On the wet surface, pour in the salt, and through this, intricate patterns are formed.
16
Elements of decor to the box are glued with universal glue "Moment".
Tip 5: How to use colored hair spray
Hairstyles with multi-colored strands are added to the imageextravagance. Colorful hairspray suitable for fans of experiments that do not want to paint the hair with paint, but at the same time they want to stand out from the crowd. This tool will give the hair the right color for the time, and also fix them.


