Tip 1: How to make an animated smiley in Paint.net
Tip 1: How to make an animated smiley in Paint.net
Smilies in Internet communication perform the same role,as well as intonation in oral speech: they transmit consent, mistrust, joy, irony ... You can create your own animated emoticons with the help of free programs Paint.net and UnFREEz.

Instructions
1
Animation consists of several imagesformat gif, which differ from each other position of the object in space, size, color, etc. To create an emoticon enough 2-3 frames. Create a document in Paint.net and use the Ctrl + Shift + N keys to add a new layer.
2
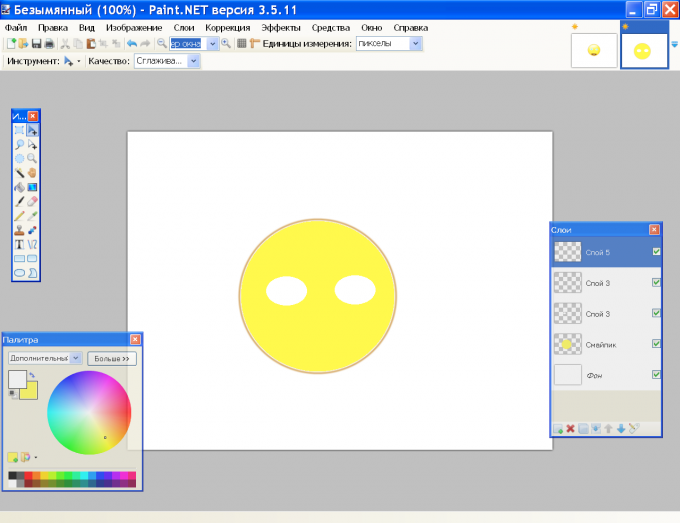
On the palette, set the front color to brown,On the toolbar, click the Oval icon, specify a width of 2 pixels and draw a circle. In the foreground, make a yellow and fill the circle with the Fill tool. Double-click the layer icon in the layers panel and enter "Smiley" in the "Name" field.

3
Create a new layer for the smiley eyes. Use the Select Oval Shape tool to draw an eye of a suitable shape and fill it with white with the Fill tool. Create a copy of the layer with the CTrl + Shift + D keys and the "Move selected region" tool, drag the second eye to the desired location.
4
Create a new layer for the iris. Select the oval area inside the eye and fill it with a blue color. Create a copy of the layer and move the second blue oval into the second eye. Use the Ctrl + D keys to deselect and merge 4 layers into one by pressing Ctrl + M. Name the layer "Eyes".
5
Add another layer on which you willto draw a mouth. Set the front color to dark brown and draw a line with the Line or Curve tool. Alternately, grab the markers and drag them down and to the side to give the mouth the right shape. Press Enter when the form suits you.
6
Now you need to add the smiley volume. Create a new layer and press S on the keyboard. Circle the smiley face to get a round selection. If the selection did not match the shape with the smiley, click the Move Selected Area tool and drag the markers to the desired direction. When the selection exactly closes the smiley, click "Brush" on the toolbar.
7
Draw a brown strip along the circlesmiley in the bottom half. The selection does not allow the brush to click on the background. In the "Effects" menu in the "Blur" group, select "Gaussian Blur" and set the appropriate diameter, depending on the color and width of the line you have drawn. Deselect Ctrl + D. Layer name "Shadow".

8
Create a new layer and again select the smiley on the outline. With a white brush, paint over his forehead and apply a Gaussian blur to make the forehead look lit. Name the layer "Blick". Deselect the selection.

9
Create a copy of the "Eyes" layer and name the layer"Eyes are slanted." Combine the layers "Eyes", "Mouth" and "Shadow". Clear visibility from the "Eyes Tilt" layer and save this image as 1.gif. Before saving, the program will prompt you to merge the layers. Click "Merge", and after saving the image, cancel the merging with the keys Ctrl + Z.

10
Now you need to create a nodding smiley. The outline of the smiley and the highlight will remain unchanged, the eyes, mouth and shadows will shift. Remove visibility from the "Eyes" layer, make it visible and activate the "Eyes Tilt" layer. Circle them with a rectangular selection, lightly squeeze vertically and move a little down.
11
Create a new layer and use the "Line orcurve ", draw a smiling mouth, fill it with white and move it down relative to the line of the mouth created earlier. Once again, create a layer and draw the shadows on it, as in step 7. The line should start lower than in the "Shadow" layer. Save the image as 2.gif.
12
Alternately, open your gifs in Paint.net and reduce their size with the "Resize" command from the "Image" menu. Save the modified files with the same name.
13
Open the folder with your gif-files, runprogram UnFREEz and drag the mouse 1.gif and 2.gif in the Frames window. Select the Loop check box and set the frame interval in the Frame dely window to about 40 seconds. Click Make Animated GIF and specify the folder to save the animation.
Tip 2: How to make a smiley
Smilies have long and successfully entered popular formsgreetings for Internet users. They meet not only on forums or in chats, but also on clothes - caps, T-shirts, etc. Yellow smiles are even used as graffiti on the walls of houses on souvenirs (posters, postcards), on backpacks and sports shoes.
When there is a desire to surprise the interlocutors,you can draw a smiley face by yourself. You can use Paint.NET to do this. Run the program and start painting the smiley face. The first step is to create the basis for the smiley. To do this, create a new image with a resolution of 800 by 600 pixels. In addition to the background, you need to create a transparent layer on which you want to draw using the toolbar "Oval" with the type "Solid figure" and select a circle. In order to create a smooth circle when creating an emoticon, you must hold down the Shift key. Color for the circle choose the traditional - yellow. To make the smiley face more natural, you can create a flare on its surface. Select the "Magic Wand" in the toolbar and select the yellow circle with its help. Then create another transparent layer and place it above the first layer with a yellow circle. Compressing alternately left and right a new layer, we are getting an ellipse. Then we set the base color to white, and make the second layer transparent. To finally finish the creation of a glare on the surface of the smiley, you need to use the function "Edge processing of the selected area" and retouch the boundaries of layers. Trying to make a smiley, first of all remember his eyes and mouth. The base of the smiley is already ready, so create the next transparent layer. Using the tools on the "Oval" and "Line or Curve" panels, draw out the outline of the eyes and mouth in black. To achieve symmetry of the eyes, first create one, and then copy the face of the smiley ready for the second half. Add the smiley pupils and circle the outlines. Pupils are also made using the Oval tool. Then select with the Magic Wand tool all the layers of the smiley and apply the "Outline Selection" effect to them in the "Edge of the selected area" tab. You can also make the smiley volumetric. For this, the "Bevel Selection" effect is applied from the already familiar "Edge Edge Editing" tab. If the result obtained has acquired a complete look for the user - it means that everything has been conceived. It remains to come up with an unusual background for the smiley. This can be done with the Gradient tool, applying it to the first layer of the smiley and the Background command. Choose any color and click OK.
Tip 3: How to make an animated smiley
Smilies used for greater expressivenessprinted text - they convey thoughts and feelings. These pictograms are found both in text form and in the form of mini-pictures or animated little men. In social networks, sets of free emoticons are standard, but you can stand out from the crowd. Just create your own smile and use it on your own.

You will need
- - A computer;
- - program Photoshop.
Instructions
1
To make a pictogram depicting emotions, you need Photoshop. Open the utility and create a new file with dimensions 50 * 50 px, apply RGB Color - the background should be transparent.
2
Increase the pattern by 1600% and click ontool Pencil tool (pencil). Take the brush size 1 px and the color # 565656. Start drawing - draw a horizontal line of 5 px on top, then move 1 px to the right and draw another small strip of 2 px. Then drop 1 px down and move to the right - draw a dash of 1 px. Move the tool down and 1 px to the right - draw a vertical line down in 2 px, and then in 5 px. Now repeat the lines in 2 px, 1 px and again in 2 px in the reverse order - move the pencil to the left and up.
3
Create another layer and start painting. Take the color # A1A1A1 and paint each pixel from the corners. Go to the next row of pixels, and change the color to #AEAEAE. Increase the staining area gradually, but only on the left side. Closer to the middle, take the color #AEAEAE - one row. Color combinations # C2C2C2 and # D2D2D2 alternate for each successive row of pixels - there should be four.
4
Then take the color # D8D8D8, paint another onerow and go to #DEDEDE - fill the right-hand side. For the middle, take # E7E7E7, and fill the remaining four pixels with # F0F0F0. Create another transparent layer and draw a left hand. To do this, draw a horizontal line of 2 px, drop a little lower and draw another line in 2 px, then back down on the pixel down and to the left - draw a horizontal strip of the same size to the left, once again step back and draw a line up - you get a small square.
5
Paint it on the same layer usingdifferent colors - for the upper left corner # E7Е7Е7, for the upper-left and lower left # D2D2D2, and for the lower-right # АЕАЕАЕ. Layer with the left hand duplicate - this will be the right hand. Take the Move Tool and move the box to the right side - you can combine the two layers.
6
Now create a folder - there will beseveral layers responsible for the facial expression. On a new layer with a transparent background, draw the strips 2 px apart and 3 px high - take the color # 565656. In the same folder, create another layer, and turn off the visibility of the previous one. Use color # 565656 to draw a horizontal strip 6 px in size.
7
Go to the Adobe Image toolbarReady is an animation, press Ctrl + Shift + M. Let the smiley blink with your eyes - turn on the layer with vertical stripes, and then with the horizontal line.
8
To the smiley jumped or just moved,Add a pixel of color # 565656 to the "body" from above and below - turn the layers on and off in turn. For him to wave his hands, you need to add a color pixel # 565656 to your hands. Emotions and actions can be different - here you can experiment.
Tip 4: How to make an animated icon
Animated icons are most often used for blogs and forums as a user avatar. They can be done with the help of additional software installed on your computer.
You will need
- - Internet access for downloading programs.
Instructions
1
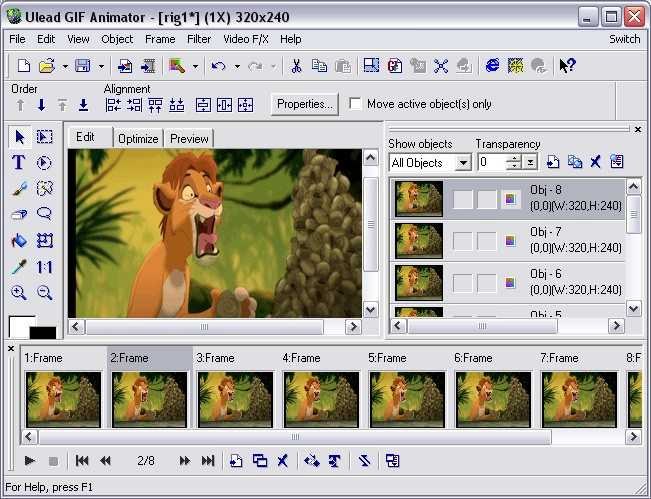
Collect all the images from which you want to make an animated icon. Edit them in the usual graphiceditor, adjusting the size, aspect ratio and so on. Upload to your computer a program for creating and editing animated images, for example, Adobe Image Ready, Gif Animator or whatever you want. Install the downloaded program on your computer, if necessary, activate it by phone or via the Internet.
2
From the menu of your program, selectcreate a new animation image. Select the number of frames, then add to each of them the selected images you edited. Configure the transition, which is usually displayed in milliseconds, arrange the images in the final order.
3
To apply special effects, usethe animation editing menu, usually they include not only the image transition settings, but also additional materials that can be included in the animation. Change the size of the image to the desired one, then apply the changes and save the picture with the extension .gif in the folder on the hard disk. If you need to save exactly icon, select the .ico extension.
4
If you want to make an animated imagefor a specific template, download it as an .atn file from the Internet, after previewing the results of the sequence. It is not recommended to use this method if you are going to continue to frequently work with animation images, since you will need to learn how to edit them yourself.
5
Please note that often animator programsalready contain a picture editor, but to ensure the best results of work, each is best handled in a separate editor for static images.
Tip 5: How to reduce the image in Paint.net
Sometimes you need to reduce the size of the image to work with it. It is convenient and quick to do this with Paint.net, a free image editor.
Instructions
1
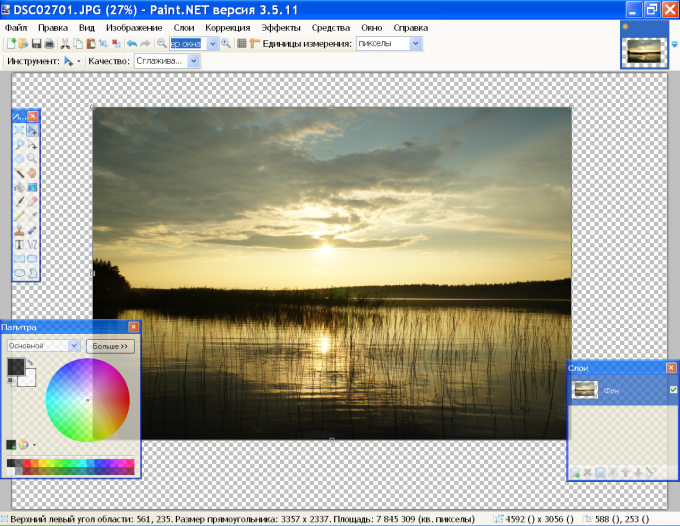
Launch Paint.net. In the "File" menu, select "Open" and specify the path to the image. Open the "Image" menu and click "Resize". In the dialog box, enter the new width and height dimensions.
2
To maintain the aspect ratio of the picture,check the box next to "Keep proportions". In this case, just enter a new value for only one of the dimensions. You can clear the check box and enter a new value for the height or width. In this case, the image will be changed along one of the coordinate axes.
3
You can do otherwise. In the Layers menu, select the Rotate and Scale command. In the dialog box, move the "Scale" slider up or down, depending on your goals. The size of the image will increase or decrease. Click OK to save the drawing.

4
There is another way. Press Ctrl + A to select the image. Mouse hook one of the corner markers of the size and drag it to the center, if you want to reduce the size of the picture while maintaining proportions. If you need to change the height or width, pull the center markers on the horizontal or vertical border of the picture. To move a thumbnail, click on the "Move selected area" toolbar, hold the picture with the mouse and drag it to another location.
5
To save a picture in a new sizeUse the "Save As" command from the "File" menu. If you save the image under the old name, the program will ask for confirmation to replace the existing file. You can agree or enter a new name for a small copy of the image - then both pictures will be saved.
Tip 6: How to make animation in Paint.net
In Paint.net there are no tools that allow you to make animations. However, the tools of this free editor can create images in the format of gif. Another free program - UnFREEZ - will turn these pictures into frames of a small video.
Instructions
1
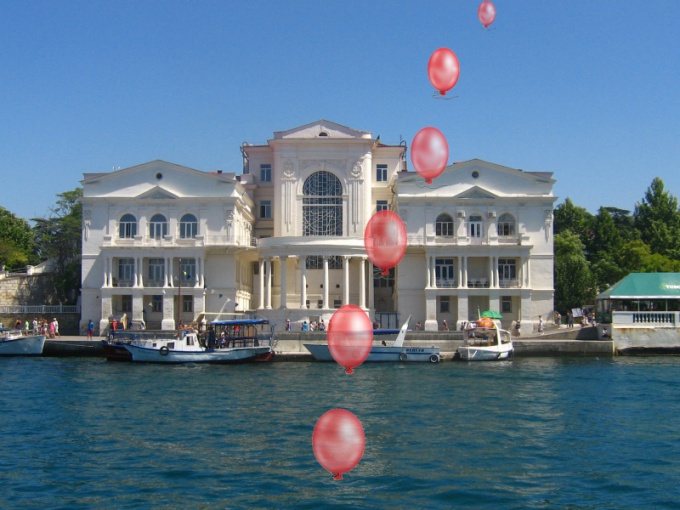
To create an animation, you can useown pictures or ready-made images. In both cases, you will need to create a series of pictures in which the position in the space of the original object is gradually changing. The more pictures you create, the smoother the animation will be. As an example, you can consider flying a balloon.
2
Open it in Paint.net background image with the "Open" command from the "File" menu. Use the same command to open the photo of the ball. Activate the Magic Wand toolbar and click on the background around the ball, then click Delete. Press Ctrl + A to select the image, then Ctrl + C to bring it to the clipboard.
3
On the right side of the toolbar, clickicon of the background layer to expand the image. In the layers panel, click the icon "Add a new layer" and press Ctrl + C to insert the balloon drawing. Hold it with the mouse and move it to the bottom edge of the background picture.

4
With the Shift key held down, pick onefrom the corner markers of the selection around the ball and drag to the center to reduce the size of the drawing. Press Enter. Double-click on the ball layer icon and reduce its opacity to approximately 190. Save the resulting image as 1.gif to make it easier to navigate in frames. When you save the program, you are prompted to merge all layers - confirm this action. After saving the image, press Ctrl + Z to separate the layers again.

5
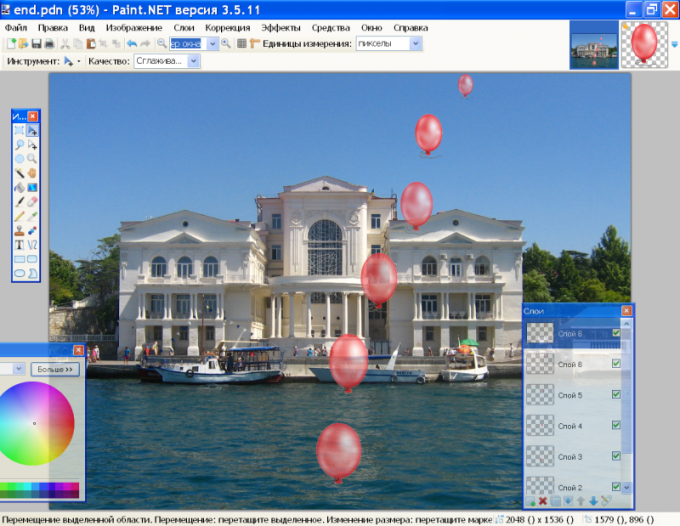
In the layers panel, click "Add newlayer "and Ctrl + V keys, insert the ball image with the uppermost layer. Reduce its size, lower the opacity and place it above the previous image. Consider the laws of perspective - the higher the ball rises, the less it seems to the observer. In addition, taking into account the wind, the ball can not rise vertically upwards, but will simultaneously move along the X axis. Remove the visibility of the previous layer by removing the tick near the right edge. Visible should be only the background and a new layer with a ball. Save this image as 2.gif.
6
Repeat these steps several times, each timereducing the image of the ball and placing it above the previous position. Do not forget, when saving a picture, to disable the visibility of the bottom layer, so that when an animation is in one frame there are not 2 balls at once. As a result, you should get several layers with balls of different sizes. The screenshot includes the visibility of each layer so you can imagine how the position of the ball changes on the background image.
7
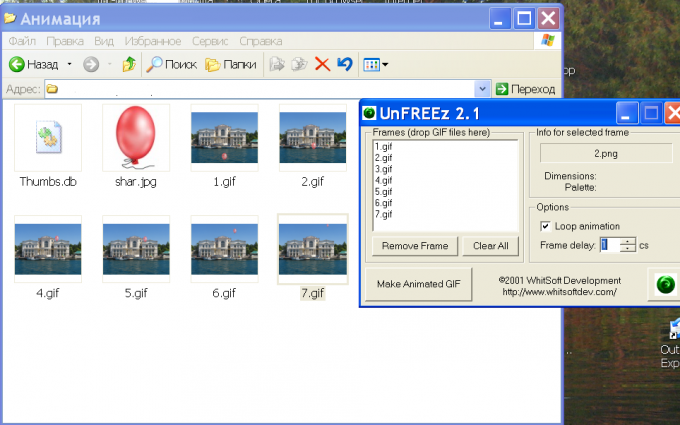
Run the free UNFREEz program and open thefolder with saved gif-files. Mouse drag the images from the file one by one to the program window. In the Frame delay window, specify the interval of the frames and click Make Animated GIF. By default, the animation will be loaded into the folder with your gif-files. To view it you can use any program for viewing images
Tip 7: How to make animated text in Paint.net
The combined funds of two freePrograms, Paint.net and UnRREEz, you can create animated text and other moving pictures. Using plugins to Paint greatly extends the capabilities of this handy image editor.

Instructions
1
Create a new file with the command "Create" from the menuFile or open a suitable finished image as the background with the "Open" command. In the layers panel, click the "Add a new layer" icon and click the "T" icon on the toolbar. Select the appropriate font and size, in the palette, specify the color of the text.
2
Create a copy of the text layer by clicking onCorresponding to the icon in the layers panel, or using the Ctrl + Shift + D keys. Turn off the visibility of the first layer with the text by unchecking its right border, and go to the copy of the layer. Press the S key on the keyboard and select the text with a rectangular border. On the toolbar, select "Move the selection", hold down Shift, click one of the corner move markers and drag to the center of the layer to reduce the text size. Press Enter.

3
Create a copy of this layer and reduce it again.the size of the text. Repeat the operation several times. Each copy will be the frame of your animation. The more you create frames, the smoother the animation will be. Click twice on the layer with the smallest image and give it the name "1". Next, name the layers "2", "3", etc.
4
Remove visibility from all layers except the background and1 and save the image as 1.gif with the "Save As" command from the file menu. Before saving, the program will prompt you to merge all the layers. Click on the item "Merge ...". When the file is saved, press Ctrl + Z to cancel the merge. Then make the 2nd layer visible by turning off the visibility of the 1st, and create a second frame of the animation 2.gif. Repeat the operation with all layers of the image, not forgetting to turn off the visibility of the previous layer.
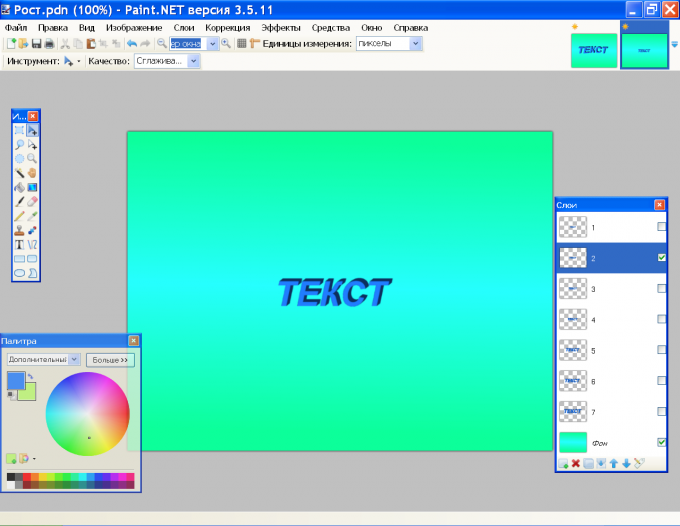
5
Run the UnFREEz program and dragAlternately with the mouse in the Frames window, frames your animation from the folder where you saved them. In the Frame delay window, set the frame interval. If you want the movie to spin constantly, check the Loop animation option. Click Make Animation GIF and specify the path where the animation will be saved (by default it is sent to the folder with gif-files). Start your movie you can any program to view images.

6
You can place all images not in one andthe same place, but with a shift along the coordinate axes: the smallest in the upper corner, the largest - in the lower diagonal. When you create an animation, the effect of approaching the text will appear.

7
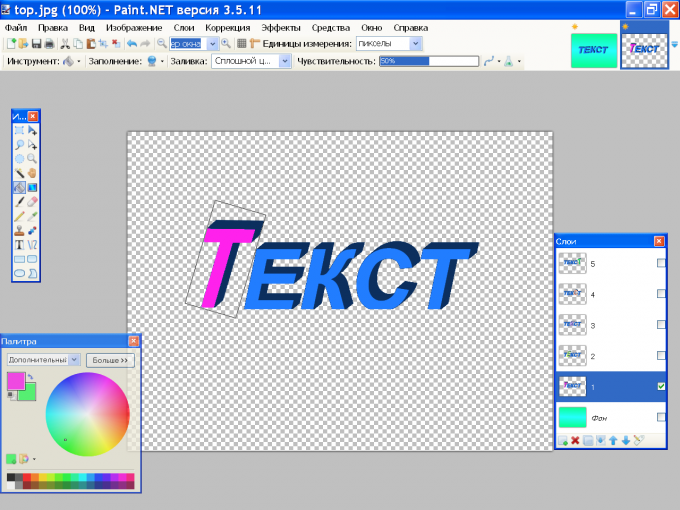
You can change not only the whole inscription, but alsoindividual letters in it - you get the effect of "dancing" text. Create as many copies of the text layer as there are letters in it. Activate the first layer. Click on the "Select rectangular area" toolbar and draw a frame around the letter. If you select an inclined font, you will need to rotate the selection to a specific angle. To do this, mark the "Move selection area" on the toolbar, right-click inside the selection and, without releasing it, slide the mouse. The frame will rotate. When the frame turns to the desired angle, drag the motion markers with the Shift key pressed to change the size of the selection.
8
Mark the "Move selected area" totoolbars. Hold Shift and drag the markers to change the letter size. If you want to change its color, press S, set the desired color on the palette, select the Fill tool and click the highlighted letter. On the next layer, change the size and color of the other letter, and so on. Alternately, turn off the visibility of the copies of the layer and save the images in the gif format, as described in step 4.

