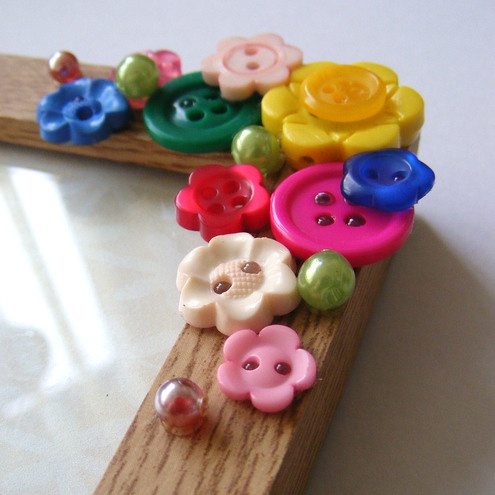
Tip 1: How to make buttons from threads
Tip 1: How to make buttons from threads
You can tie anything from anything - from large global things to small but very important accessories. You can even decorate your product with homemade buttons. They are very easy to make out of ordinary Thread with the help of a crochet hook. They will look very original and unusual.
You will need
- -hook;
- -form, for example, in the form of an ordinary button;
- Tracks;
- -needle;
- -pencil.
Instructions
1
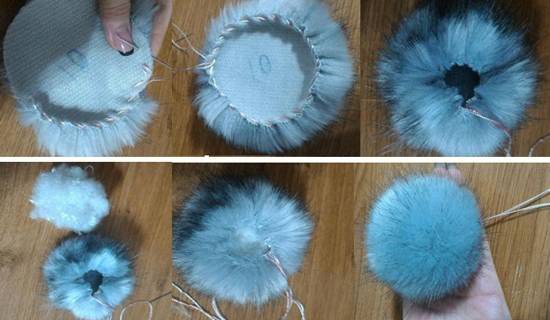
First decide what color your buttons. They can be selected in the color of the product orin contrast. Take an ordinary pencil and start winding a thread on it. Remember that the number of turns that you make depends directly on the thickness of the thread and on the size buttons, which you are trying to achieve. On average, as a rule, about 20 turns are used.
2
Then cut the thread, leaving the long end. Pass it through the eye of the needle, tighten, then you can remove the winding from the pencil. Now start sewing the threads in a circle. Make it a simple seam. When finished, hide the remaining tip from the back buttons. If you want, you can decorate it in the middle with beads.
3
Make a button with a hook. Twist the thread into a ring, and then start tying it with half-corks without a crochet. Approximately 7-8 pieces. Then go to the next row. Continue to knit half-loops on the principle of one loop 2. Then another row with the addition of loops. Then one with the same number of polustolbikov, as in the previous one. Now start to reduce the loops. So gradually you will have a convex button.
4
Tie a button for your product on the form. To do this, take the button, measure it, and then start knitting. Knit, as in the previous step, only to that level, while you add loops. You need to add them until your knitting reaches the contours buttons-bases. Then you can decrease. Reduce loops more often, because your knitted blank should fit tightly to the base. Close the knitting. Your button is ready!
5
Give originality to your self-madeElements of decor will help the buttons. For decoration you will need beads, crystals, small stones, ribbons. Do not be afraid to experiment, and then you will get a unique decoration for your thing. The main rule - select these elements of decor, based on what kind of product you want these buttons use. After all, in the aggregate, they must complement the image, working in it harmoniously.
Tip 2: How to make a button
Buttons on the shelves of specialized storesyou can find a great variety - any colors, sizes and textures. To pick buttons for a dress or a coat is easy. Any hardware department will provide you with thousands of options. But sometimes it's so desirable to have something unique, unusual. Some detail that will make the thing unique and unique. If you, in addition, also know the technique of crocheting, why do not you try to make knitted buttons with your own hands?
Instructions
1
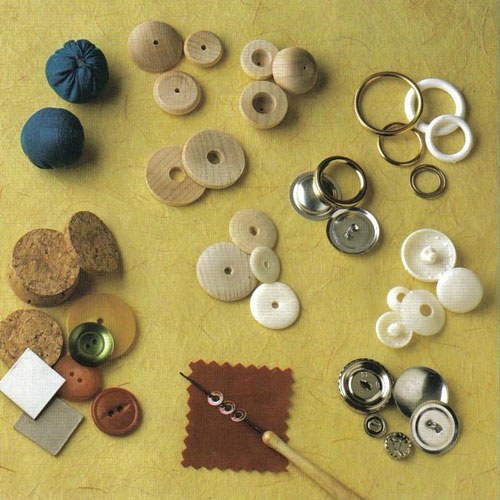
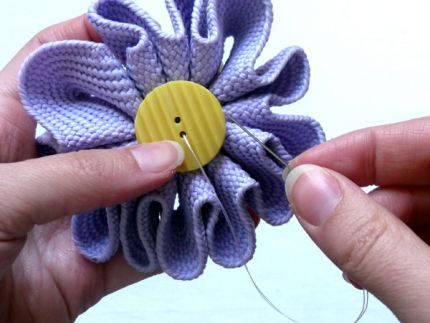
First of all, select the threads from which you want toknit a button. By color and texture, they should be well combined with the product, which as a result will be sewn on the buttons. Do not choose too thin threads - it will not be very convenient to work with them. To start, tie a square or circle (depending on the desired shape of the button) to the column without the crochet. Its diameter should be slightly larger than the desired size of the button. Then, grasp the edge loops on the needle. Insert inside a firm button, flat or on a leg - of your choice. Tighten the caught threads in the center or at the edge of the button, then fix the threads.
2
Find the wand corresponding to the thicknessthe diameter of your future button. Then wrap it with a thread (it should be twenty or thirty turns, it depends on how thick you want the button). Cut the thread, leaving the long end. This end is in the needle, remove the ring from the stick and thread it with a thread. Sew a ring with a stitch. Fill the middle of the ring with the thread around it. To do this, you can use a new thread, if it is more convenient for you. Make several stitches on the bottom crosswise - they will serve as a leg, with these stitches you can then sew the button to the finished product.
3
Hook the three air loops, connect thempolustolbikom without a crochet. Under the resulting chain of the circle, knit the tubercles with three capes with a dense ring. Tie the edge of the button with the pillars without the crochet.
Tip 3: How to tie a button crochet
Most knitted products require clasps. Sweatshirt, pullover, cardigan, women's handbag - all these wardrobe items must be fastened and for this you can both use ready-made zippers and buttons, so do buttons yourself. Buttons related crocheted, will be a beautiful and organic addition for any knitted thing - you can tie buttons from the same yarn, from which your product was createdand they become for the thing an independent decoration. If such a button is torn off and lost, you can at any time connect the same, replacing the old one with a new one.

Instructions
1
Make a wool thread the right colora single loop and wrap it clockwise around the index finger so that the short end of the thread is facing left. Hook for crochet pick up the thread and stretch the first loop into the ring.
2
Then tie another loop. Tie a ring with simple stitches without crochet. Tie seven or eight bars, then go to the next row and again in a spiral bind seven or eight bars.
3
Repeat this action again in the third row of knitting. Pull the short end of the thread and tighten the ring as tight as possible. Leave the thread free to hang, do not cut it.
4
Spray the half-barrel by connecting the first row of the ring harness, and then tie one lift loop to begin the next row of strapping.
5
Knit in a circle and tie one column in the first loop of the previous row without a crochet, and in the second loop - two bars without a crochet. Connect the resulting strapping with a half-tube.
6
Tie up the lifting loop and tie another row,tying the button. Pull it off, tying one bar without a crochet from the first loop of the previous row, and from the second and third loops pull the threads. Three loops are formed on the hook. Spray them together.
7
Continue until the button is tightened, and then connect all polustolbikom. Use the hook to pull the short end of the thread inside out. Turn out the button and sew the hole.