Tip 1: How to assemble a drum kit
Tip 1: How to assemble a drum kit
The drum set is an independenta musical instrument, like a piano or, say, a harp performing its own tasks in the general musical harmony. Accordingly, the assembly of such an installation will depend precisely on the tasks assigned, because working with jazz compositions or conducting a metal team requires completely different approaches and accessories.
You will need
- - a set of lambs, screws and gaskets;
- - cranes and racks in accordance with the needs;
- - clamps;
- - pedals;
- - stool.
Instructions
1
Refine yourself what you need frominstallation. It is worth remembering that the abundance of accessories and accessories in the drum kit never spoke of the skill of the drummer, on the contrary, many recognized masters simplified their working tools over time. The kit of drum sets can depend on the chosen style of music.
2
Install the barrel. Assembly of the drum set usually begins with the installation of a drum - a bass drum, around which additional capacity is built up. The barrel is placed in a fixed position with the help of the spacer legs, which, as a rule, are supplied with the tool.
3
Add the working drum to the barrel. The second in order is a small (or working) drum. Small drums are found in different sizes and, accordingly, with different sounds, and therefore some drummers prefer to use several small drums at once. They are installed on special tripods, not supplied with the tool itself.
4
Set the plate. After installing the working drum to the installation, a plate called raid is added, it is attached to a special crane. Barrel, working drum and ride - the minimum kit of the drum kit, which is used in such styles as rockabilly, light jazz or dixieland. These are the settings used by the groups "Mr. Twister", The Dukes of Dixieland or even "Leningrad" for many compositions.
5
Add the necessary. For other styles of music, often more accessories are required. For example, the same jazz, progressive rock or fusion requires the installation of additional plates. In this case, we mean a plate with a powerful but short sound called kresh and two plates controlled by a pedal - hi-hat. It should be remembered that the need to install plates is conditioned by the requirements for the sound of a particular composition and the skill of the drummer. For example, a British drummer from the rock band The Who as a crock-cymbals preferred to use raid-plates, which did not affect the sound of his installation.
6
Attach additional elements to the frame. To create certain sound effects, so-called effect-plates are also used, which are set to installation with the help of additional devices -clamps. The effect plates include tea (small plates with characteristic "Chinese" ringing), splash (medium-sized dish), siszl (a special sounding plate), a whistle (a plate with metal details giving extra sound), cowbell (a dead metal bell, usually in the form of a parallelepiped), a wood block (a ringing wooden bell), a tambourine and its close relative a rot.
7
Install additional reels. When performing heavy styles of music, it becomes necessary to use alt-high, low and floor-volume volumes. They are usually installed in accordance with the names - next to the working drum, just below it and on the floor with the help of tripods and clamps, but often the drummers arrange these drums in their own way and according to their preferences.
8
Install the cardan and the second barrel. Special requirements stipulate the use of cardan - a special pedal, which gives not one blow on the barrel, but two alternate ones, as well as the second barrel.
Tip 2: How to assemble a barrel
Kadushki and barrels and for today findwide application in the economy. Homemade pickles, kvass or honey, which are stored in barrels, acquire a unique taste. However, cooper is a rare profession. How to collect barrel own hands?

You will need
- - an ax;
- - wood;
- - Sherhebel;
- - plane;
- - jointer;
- - steel tape;
- - a hammer;
- - Drill;
- - wire;
- - Staples.
Instructions
1
Pick up the wood. You should be aware that the choice of wood depends on the purpose for which you intend to use barrel. For example, pine and oak are absolutely not suitable forstorage of honey. Honey from a pine barrel will smell like resin, but in an oak tree it will darken. For such barrels it is recommended to use aspen, linden, alder, poplar or plane tree. For oatmeal, salting and watering, oak is the best choice. For other purposes, you can use cedar, spruce, beech, larch, fir or birch.
2
You should know that it is recommended to use the lower part of the trunk of old trees for staves. However, in the absence of such an option, thin trunks are also suitable.
3
The riveting follows from raw wood. Take a suitable chuck. Its length should be 6-7 cm more than the required length of the finished riveting. Carefully split it in half with an ax. Split the resulting halves of chocks once again in half. Act by analogy - the number of splits depends on the original thickness of the chocks. As a result, you should receive blanks 7-12 cm wide and 3 cm thick.
4
Thoroughly dry the riveting. To speed up the process, you can use a dryer.
5
Make a template to check the radius of curvature of the surfaces. It can be made from a thin board, checking with any finished barrel.
6
Choose the type of riveting. It should be noted that the riveting may be pottery or kedushchnoy. At kusushhechnoy - one end is another. In kocharnoy - expansion in the middle. As a rule, the ratio between the narrowest and widest part is 1: 1.8.
7
Carefully process the riveting with a planer andSherchebel. First, the outer surface should be trimmed, and then the lateral surface should be stitched. In the process of work, it is necessary to check the curvature of the riveting, checking with the template previously made. Treat the side walls of the rivet with a fuser. Carefully work the inside of the riveting with a planer.
8
Make hoops of steel tape. For this it is necessary to measure barrel in the place of tension of the hoop. Cut the tape of the desired length and bend it into the ring, hitting it with a hammer. Drill holes and install rivets from steel wire.
9
Collect barrel it is necessary on a flat surface. Take two rivets and fasten them to the hoop using special staples against each other. Fill in the resulting gaps, gradually setting the riveting behind the riveting.
10
Saddle the hoop, tap it with a hammer and make sure that the rivets fit tightly to each other. Put on the middle hoop and lay it down with a nib.
11
Deliver barrel on a flat surface and mark the cut line. Wear a chiffon hoop, trim the skeleton and process the cut line with the help of a plane. Do the same procedure from the other end of the keg.
12
Make a groove in which the bottom of the barrel will be inserted. The width and depth of the groove should be 3 mm.
13
Calculate the radius of the bottom. Collect the bottom shield by attaching it with nails. Cut the chamfers from the edges using the shrewheel.
14
Insert the bottom into the barrel. To do this, you must first install one edge of the bottom in the groove, and then insert the rest of the part, slightly striking it with a hammer. Check with the tightness of the barrel.
15
Make a second bottom by analogy. Drill a filling hole in it. Make a cork. The height of the plug should correspond to the thickness of the bottom of the barrel.
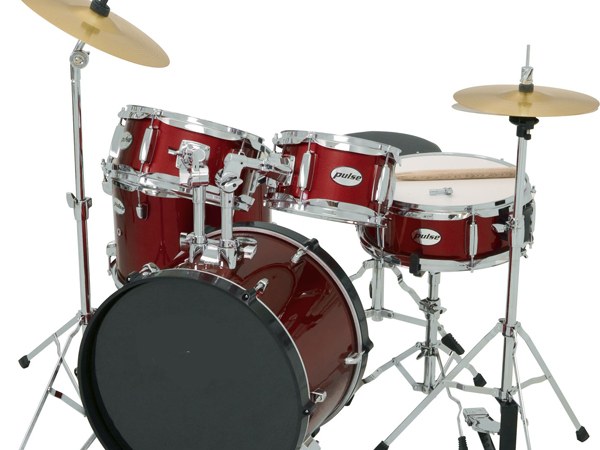
Tip 3: How to adjust the drum set
Shock installation is, in a way, a skeletonmusic, a tool that sets the rhythm to which all others are subordinate. And, like all other instruments, the drums can be tuned to the music style in which you play.

Instructions
1
Set up the volume with volume volumes. Take the top plastic and put it on the drum. Top the hula hoop and begin to tighten the screws. Twist them gradually, and not one by one, but those that are opposite to each other - in this case the tension of the plastic will be uniform. Watch how the plastic is positioned relative to the cad. As soon as the bubbles and wrinkles disappear from the plastic, proceed with the further tuning of the instrument. The height of sound from one of the screws is taken as a sample. Check the sound of each screw and customize it for this sample. Do the same procedure with the lower plastic.
2
Now it's the turn of the small drum. Its sound is composed of the ratio of the tension of the plastic with the tension of the strings of the sub-string. The upper plastic of the snare drum can be adjusted in the same way as the plastic of the tom-volume, but with the bottom one everything is much more interesting. It does not have to be customized to sound like the first, here you have a lot of space for creativity. If you adjust the bottom plastic in unison with the top one, then you will get a classic sound. The main thing is, do not stretch the strings too much - this will lead to a deterioration in the sound quality.
3
To set up the big drum, put it on thefloor so that the plastic that you set up is in front of you. If you play on a drum with both plastics, then during the setup, remove one of them so that it does not interfere with setting the other. On the tunable plastic, alternately tighten the bolts, achieving the desired sound. In the event that you want to achieve the ringing sound of the drum, play with the front plastic. To avoid echoes, glue on the working plastic under the strip of foam rubber, and to the front - the same strip, but on top. To achieve a more complete sound, adjust the working plastic lower than the front one.
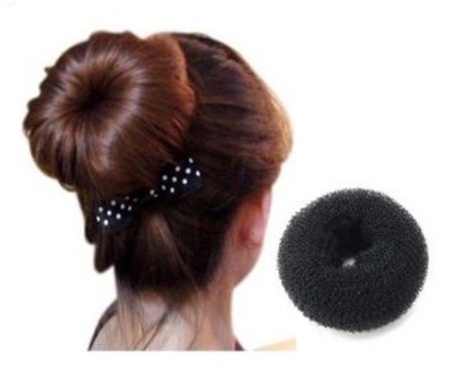
Tip 4: Hair Accessories: Sponge Bundle, Twister and Mount
Everybody heard that the right choiceAn accessory can create a miracle in the chosen image. It is necessary to have a tremendous taste in order to pick everything correctly. Owners of long hair can easily buy various accessories for a beautiful hairstyle.

Instructions
1
This season is fashionable sponge-beam, which will helpmake your hair style neat and stylish. Such a sponge is a kind of medium-sized ring made of porous material, with its help you can easily create a bunch on your head. You just need to collect the hair in the tail, dress the sponge and pin the hair in a circle with the help of hairpins.
2
Returned from the 90's such a hairpin, like a twister, withher help, too, you can create a hairstyle in two minutes. The frame of such a barrette is made of wire, and the shape of an elongated strip is able to cover any density of hair. Such a hairpin keeps the hairstyle just fine, without requiring any hairpins. With this hair clip, you can make more than twenty different styles. Twisters are decorated with rhinestones and various stylish prints, so there will be no problems with the selection of color for clothes.

3
The clip of the montage is also a fashion accessoryfor hair. Such an accessory has the form of two combs adorned with various small details for decoration and connected together by threads or velvet. It is easy to create a bundle, roller, shell or other styling that will last all day. Such hair clip will fix even thick heavy hair.

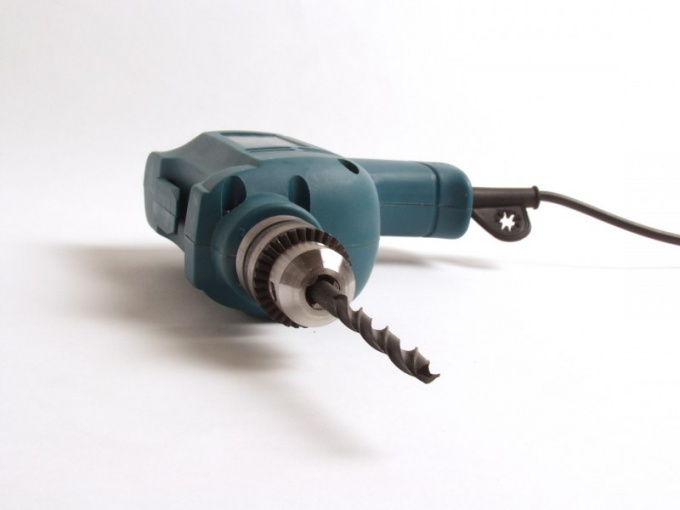
Tip 5: Perforator or impact drill: what to prefer
To hang a hanging shelf, you needdrill holes in the wall, this requires a tool. Often you have to choose between a drill and a perforator. Many do not know the difference between these tools. In order to make the right choice, you need to clearly understand what these tools are.