Tip 1: How to make a hairpin "Satin bow" with their own hands
Tip 1: How to make a hairpin "Satin bow" with their own hands
Little women of fashion, like all adult women, like all sorts of jewelry. Therefore, they will probably have to like the hairpin "Satin bow", which can be easily done by yourself.

You will need
- - wide, medium and narrow satin ribbons;
- - Flat base for hairpins;
- - scissors;
- - double sided tape;
- - thread;
- - glue gun;
- - a brooch;
- - scissors.
Instructions
1
Cut off from a wide satin ribbon such a piece,which will be 2 times the size of the future bow. Then from two-sided scotch it is necessary to cut off two narrow strips. We glue them to the edges of the tape, and then close it in the ring. In the same way we make one more ring from a wide tape.

2
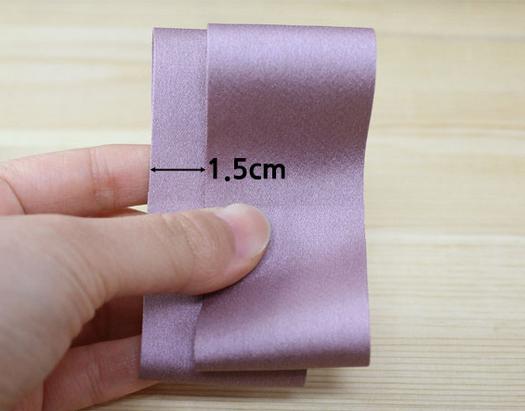
Then we take two received rings and overlap one another so that between them there is at least one and a half centimeters left. Places of fastening of rings should be necessarily in the middle of a bow.

3
We take the thread and with its help we fix the rings from the satin ribbons exactly in the middle.

4
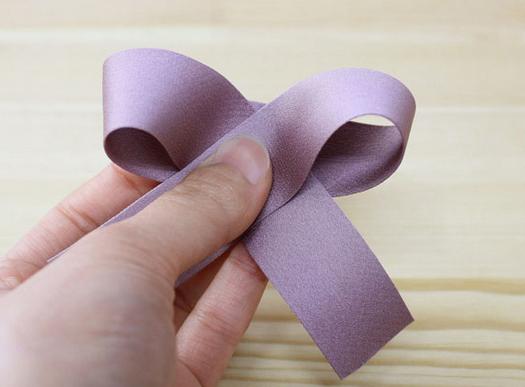
Next in the course is a tape of medium width. Cut off the strip. It must be bent so that it forms a loop, the ends of which are crossed with each other at an angle of 90 degrees. The inner side of the resulting loop should be pressed to the point of intersection of the ends of the satin ribbon and fixed exactly in the middle with a thread.

5
Now you need to connect the bows from the wide and medium ribbons with each other, then glue them with an adhesive gun.

6
From a narrow satin ribbon, cut a small strip. With her help we will close and decorate the center of the bow. This ring can be fixed as an adhesive gun, and sew a thread from the wrong side.

7
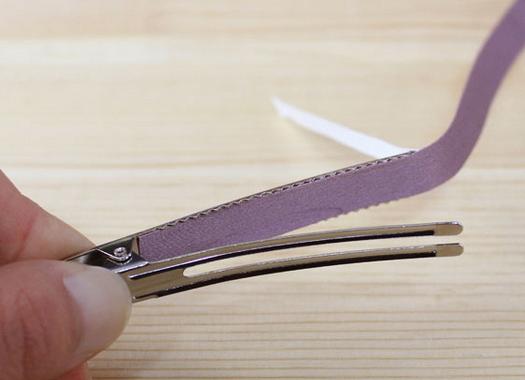
We decorate the hairpin. To do this, you need to cut out a strip of narrow satin ribbon, which is exactly twice as long as the base of the hair clip. We paste adhesive tape on the tape.

8
We begin to glue the hairpin from the inside, after which we go to the outside. Remember that on the outside you need to cover not only the barrette itself, but also all its notches and bends.

9
It remains only to paste the hairpin to our hand-made article. We do this with a glue gun. Hairpin "Satin bow" is ready!

Tip 2: How to make a satin rose-kanzashi
Satin rose-kanzashi is easy to manufacture,festively looks on the rim, barrette, bracelet or brooch and allows you to create beautiful handmade gizmos. And most importantly - its production does not require special skills and complex tools.

You will need
- - Satin ribbon width 5cm
- - Scissors
- - Lighter or candle
- - Hot glue gun or thread with a needle
Instructions
1
Prepare squares with a side of 5 cm from the ribbon. 15 to 18 petals are needed for a single rose, the exact amount depends on the desired volume of the flower. For a bud, 5-6 petals are enough.

2
Square bend diagonally. Should be a triangle.

3
Connect the ends to the vertex of the resulting triangle. Hold the petal with tweezers.

4
Cut the bottom of the petal.

5
Scorch the untreated sides of the petal. Prepare the required number of elements.

6
Go to the arrangement of the rose. Turn the first petal in half and sew or fix with a glue gun. The smooth side should be inside.

7
Add the rest of the rose petals one by one until the desired volume is obtained.

Tip 3: How to make a hair clip-bow
Charming bobby panties - favoriteadornment of women of fashion. Accessories in vintage style can be made from small pieces of lace. From bright fragments of their felt can be made spectacular hair clips in a matter of minutes. A lovely multi-layered bows in the American style will please the little princesses.

You will need
- - the basis for the barrette;
- - a small piece of cloth;
- - felt;
- - lace;
- - reps and satin ribbons of different sizes and colors;
- - a button or bead for decoration;
- - glue gun;
- - hot glue;
- - the needle;
- - thread in the tone of the fabric.
Instructions
1
Banty-lace of lace Take a lace of the desired width and cut so that its length is 2 times higher than the desired value of the bow. Cut one more detail to decorate the middle of the product.

2
Fold the lace so that its sliceslocated in the middle of the purl part of the workpiece and a little found each other. The second piece folded several times and drag it to the middle of the workpiece for the bow. Tie a knot on the wrong side and cut off the ends. The bow is ready. To make the detail more magnificent, you can make another part of a larger size from the lace of contrasting color or material in tone and attach it to the wrong side of the smaller one.
3
To the workpiece, attach the base for the barrette and sew it with a few stitches. Do this through special holes on both sides.
4
Bant-barrette of felt The foam is an excellent material for making all kinds of ornaments. He is of a variety of shades. Working with it is very convenient, since its edges do not crumble.

5
From the felt, cut a rectangle 5 cm wide andlength 15 cm. Cut a piece of lace the same length as the rectangle of the main material. Fold its sides to the center so that they slightly find each other. Attach the lace and wrap the blank with felt, while the ribbon should be located exactly in the middle of the rectangle.
6
The workpiece should be tightened with a strong thread in the middle,forming a bow. To cover the thread, attach a thin satin ribbon. On the wrong side of the bow, sew its slices. On the front side in the middle, glue a decorative button or bead. To the wrong side of the bow, attach the workpiece to the barrette and sew it with a few stitches.
7
American bow of satin ribbons2 parts of a ribbon with a width of 2.5 cm and a length of 50 and 40 cm. From the satin ribbons 1 cm wide, cut 2 pieces of 30 cm each, 2 pieces of 26 cm and 8 satin ribbons 2.5 cm wide and 12-13 long see All details burn with both sides with a lighter, so as not to crumble edges. On all ribbons, mark the middle with a simple pencil.

8
Take the biggest reps ribbon. Attach one end with a loop and attach it to the marked center of the tape. In the same way, wrap the other side. The result should be a figure eight. Kick with a pin the junction of the ribbon slices. Similarly, fold a piece 40 cm long.
9
Eight edges in the middle of each otherand sew each bow with stitching stitches. Then pull them off and thread around the stitches. Fold the narrow ribbons also with eights and grind the junction points with pins. Connect them to 2 pieces and sew in the middle.
10
Finish the ends of the shortest ribbons with a corner. Put them on top of each other in a circle. Beat the center of the pin. Then, attach a large bow from a ribbon ribbon, on it a bow of smaller size and a piece of narrow ribbons. Sew all the parts together in the middle and wind the entire construction with a thread in the center, pulling down the bow.
11
To the wrong side, glue with hot gluethe base for the barrette in the middle, and in order to make the design stronger, sew the hairpin with a few stitches through special holes. In the center of the American bow, glue the bead.


