How to draw Bob's Sponge in stages
How to draw Bob's Sponge in stages
SpongeBob is a favorite character of many children. This glorious hero lives at the bottom of the ocean and pleases the children with his positive and beautiful lifestyle. So it's no surprise that many babies want to paint Bob's Sponge, but not everyone can. You can help your child and go through with him this simple step-by-step lesson.

Instructions
1
Draw the original outlines. It is enough to depict 3 curves of the line, which will determine the initial position of the body of our hero. Draw it slightly bouncing. For this line it is necessary to draw diagonally. If you want to draw it standing straight, you have enough and two vertical lines.

2
Set the square shape. Add waviness to the original lines. Since our character is a sponge, its contours simply can not be smooth. But the lower part should be strict, since it is there that its square pants are located. Do not forget to depict the approximate location of the legs and hands of our character.

3
Add details. Draw the limbs of the sponge. Note that the hands are not on the suit, but on the head. When painting shoes, do not go deep into details. In the final part, they will still have to be painted black.

4
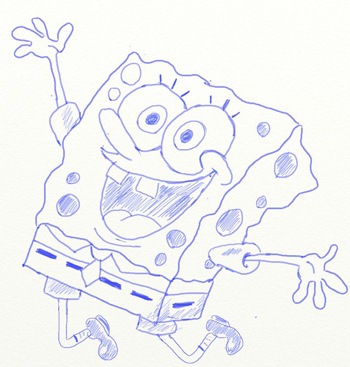
Draw two large eyes, nose and mouth. Note that near the corners of the mouth our hero has voluminous dimples. Also at this stage you need to detail the suit and limbs. Draw your fingers, trouser legs and sleeves.

5
Dark color paint porous dimples on the bodySponges of Bob. Add additional details of clothing such as a tie and socks. Draw a tongue and two large teeth. After that you can proceed with the coloring.