Tip 1: How to draw up a terrain plan
Tip 1: How to draw up a terrain plan
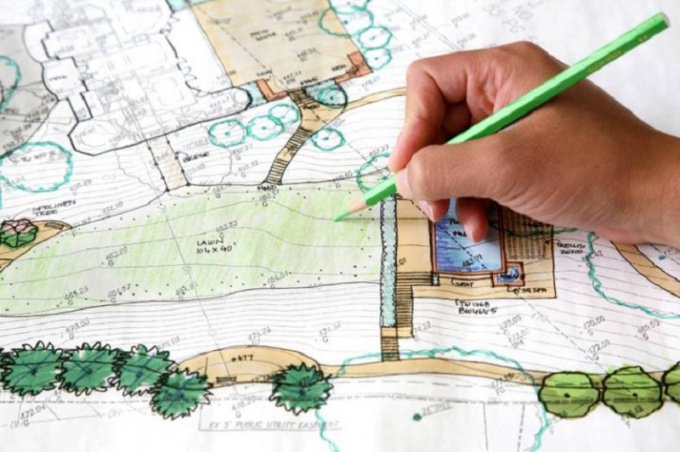
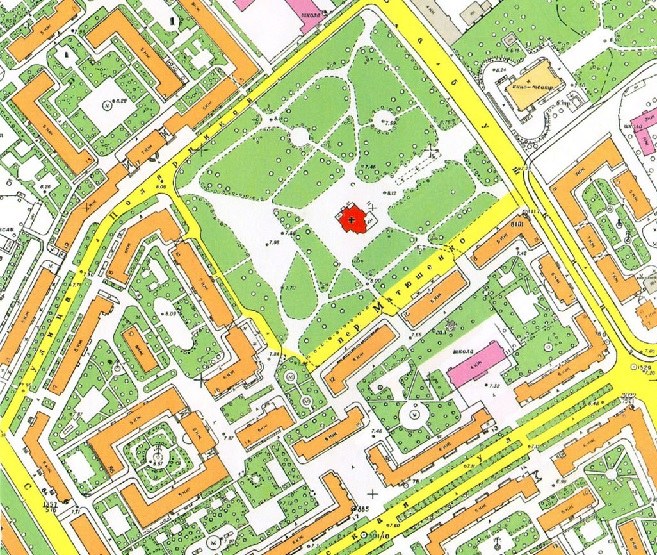
Plan locality - a drawing of a small area of the earth's surface may be required for tourists, sports orienteers, land surveyors. This is a schematic image of a large scale, usually no smaller than 1: 1000. Plan locality can be compiled from an instrumental survey or a ready-made map, but you can also use an eye-to-eye survey if you do not need specific accuracy.

You will need
- - A sheet of white paper on a rigid base;
- - Compass;
- - Protractor;
- - ruler.
Instructions
1
To create a topographic plan, study the special symbols used to mark objects located on locality - roads, communications, buildings, hydrographic objects and vegetation.
2
If you want to make such a plan on the eyeshooting, then select the highest point, from where you can see the whole area, on which you want to make a plan. A sheet of white paper is attached to the hard base - the tablet. Select the scale required to fit the entire plot on the plan. Draw the north-south arrow and orient the tablet on the planar hard base, compass, to make the plan.
3
Draw a point of your standing on the plan and with the ruler, apply directions to the objects of interest to you and the main landmarks located in this locality. These include water towers, pipes, freestanding buildings and trees, bridges, crossroads.
4
Direction for each such point, measure byazimuth - the angle between the direction to the north and the direction to the object. Put this direction on the plan with a protractor. In this direction, mark the distance to each point on the selected scale. It can be measured in steps or in pairs of steps and then translated into meters and centimeters corresponding to the selected scale.
5
The main points selected as landmarks reflecton the plan those conventional signs that correspond to them. Look carefully around the terrain and apply the step-by-step measurements or "by eye" the location of the other objects that you want to see on the plan - linear objects: rivers, roads, vegetation boundaries, fences. In the same place, you can mark gullies, pits or hills, hills, indicating their approximate depth or height.
6
On the plan, sign the scale, as well as all necessary and facilitating orientations of names and names, from above write the title of the plan.
Tip 2: How to draw up a site plan
Your dream came true, you became the owner of the garden section or a country house. You want to do everything at once: plant flowers, build an arbor, dig a sandbox for children. Do not hurry. Before you start a large-scale work, you need to carefullyto plan location of all objects. For this, take a pencil, paper, connect the fantasy and forward.

You will need
- - a geodesic plan indicating the routes of underground communications (gas and water supply, sewerage) and groundwater level
Instructions
1
Determine the shapes and sizes section. The larger the plot, the more interesting it will be for you to plan. Regardless of the shape section, having a well-developed fantasy in it, on ityou can arrange all the desired objects and it will differ in its non-standard. If the site is small, it should not be cluttered with small parts, further reducing it visually.
2
Formulate for yourself the purpose section: whether it will be a summer residence with a kitchen garden, can infuture you plan to build a house there or you want to refine the territory and sell the plot more expensive. Depending on this, you need to determine the number of objects that you want to place on the site. Most often it is a house, a bath, a toilet, a barn, ornamental flower gardens, a garden, a garden, a lawn, a playground for children, walkways, etc.
3
Draw a plan section today, such as it is. Mark the boundaries, the location of the traffic intersection and all the objects that are available: construction, planting, water lines, central sewerage and much more. If the site is uneven, the direction of the gradient should be indicated schematically. Everything must be scrupulously measured and plotted on the plan section.
4
Put on the plan all the desired objects. In this case, it is necessary to take into account sanitary norms and rules, the interrelation of objects and their mutual influence. So, for example, beds in the garden are best placed on the sunny side, away from trees, and fruit trees and berries - so that they have enough moisture, but the roots were far from groundwater, and also consider the growth of bushes in the future. If you are thinking of building a bathhouse on the site, you need to decide where the water sink will be located. Sewage pit and water discharge should not be near a well or well with drinking water.
5
Pay attention to the features of the landscape. If the site is flat, you can plant a lawn or make a playground. Where there are many unevennesses, you can plant an alpine hill. Do not rush to uproot the trees, they can not only perfectly fit into the composition of the general form section, but also successfully supplement it.
Tip 3: What is a terrain plan
Even ancient travelers and explorersdrawn maps of entire continents, still striking with their accuracy, but they began for sure with the creation of terrain plans. The terrain plan is a reduced image of a small area of the earth's surface in the orthometric projection, as if the direction of the view of the person looking at it from above was perpendicular to this surface.


