Tip 1: How to connect a voltmeter in the VAZ
Tip 1: How to connect a voltmeter in the VAZ
In order to prevent the breakdown of the generator, it is necessary to monitor the voltage in the on-board network. For this, it is best to approach voltmeter, which remains correctly connected. Let's consider how to do this by example VAZ-2106.

Instructions
1
Determine where the new instrument is installed on the panel. The best place for this is the installation of a regular clock. So, find voltmeter, for example, usual from UAZ or VAZ from more recent models. Prepare a wire about half a meter long and a "mom" type terminal.
2
Disconnect the battery to avoidshort circuit and damage of electrical equipment. First, carefully remove the watch from the instrument panel. To do this, disconnect the wiring and remove the cartridge with a backlight. Do not forget to remove the O-ring, which will later be useful for installation voltmetera.
3
Connect voltmeter to the positive terminal of the lamp, which is in the glove box. Power is supplied to this lamp only when the ignition is switched on, so voltmeter will not run idle. "Plus" from the clock is not used in any case, because of the DC current flowing there. In this situation, the device is able to discharge the battery even with a long parking with the engine off.
4
Pull the wire through the pre-madehole from the clock to the wall of the glove box. Remove the supply wire from the lamp and attach the correct length to it, at the opposite end of which secure the "Mom" terminal. After that, remove the mount from the voltmeterAnd try to install it in the hole. If it dangles, then wrap it several times with an insulating tape at the base and put on the O-ring.
5
Connect the black wire from the clock to the negative terminal voltmetera, and to the "plus" - a wire with a terminal type "mother". The remaining red wire from the clock is insulated with an electrical tape. Insert voltmeter in the hole and secure it. Turn the ignition on and look at the device - it should show the onboard voltage. If the voltage drops when the engine is switched on again, remember that this indicates a low battery charge.
Tip 2: How to connect the generator to VAZ 2106
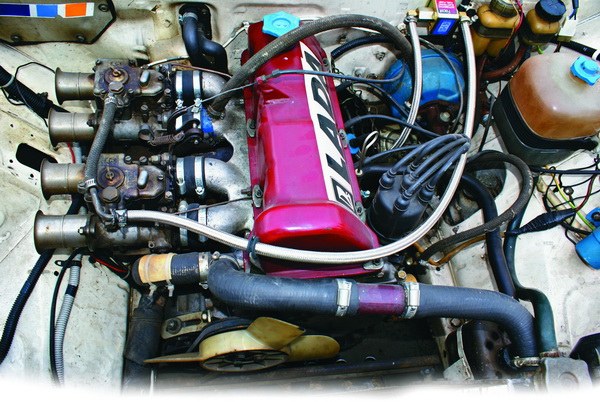
If during the operation of the car VAZ 2106 on its instrument panel the indicator of a charge of the storage battery constantly burns, it is necessary to spend the primary check of automobile Generator. If in the course of such a check a general malfunction is detected Generator, it must be removed for more accurate verification and subsequent repair. In view of this, the owner of the car VAZ 2106 should be able to remove the generator and then correctly connect it.
You will need
- - generator;
- - bolts;
- - keys;
- - screws;
- - washers;
- - the voltmeter.
Instructions
1
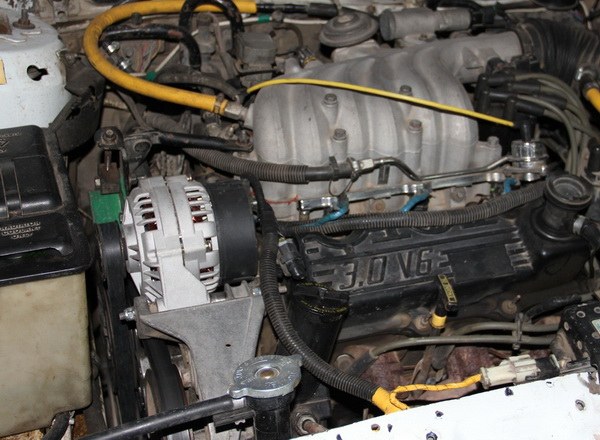
Installation of automobile Generator, as well as its removal, is performed onlift or in the inspection pit. Place the new generator in the space reserved for it (near the engine) and fix its location with a bolt and washer. Then put on the bottom nut Generator.
2
Put two wires from the output "30": wire 1 coming from the plug of the central terminal of the stator winding, and wire 2 coming from the output of the brush holder "67". Be careful and do not mix these wires! Distinctive feature of wire 1 and output "67" is the absence of insulating pads.
3
Attach the wire harness nut to the vehicle Generator and put a rubber protective cap on top of the "30" terminal. After that, screw the nut, with which the generator is fixed to the tension bar.
4
Put on the belt Generator first on the crankshaft, then on the pulley Generator and only after that on the pulley of the pump. Then tighten the fastening Generator to the tension bar located in the engine compartment.
5
Install the dirt guard and secure it by tightening the 12 fastening screws. That's all: the generator is installed in its rightful place.
6
After installation Generator check it. Although there are three ways to verify the operability Generator (by car, with an oscilloscope, as well as at a stand), the most acceptable at home is a check Generator by car.
7
Start the engine, with engine speed2500-3000rpm and full charge of the battery measure the voltage on the battery terminals. If the result is greater or less than the normal value (14 volts), then the problem is most likely hidden in the voltage relay. If the voltage indicator deviates from the norm after the replacement of the relay, the generator installed on the car needs to be repaired.
Tip 3: How to disassemble the VAZ 2106 engine
If in the conversation between the drivers the phrases sound: "move engine", "engine overhaul", means, engine Already outlived his. As a rule, in the process of repairing this car assembly, most of the parts of the old engine are thrown away, replacing them with new ones.

You will need
- - spare parts;
- - instruments.
Instructions
1
Remove the engine. Then unscrew the bolt to attach the frame, which is installed to remove the engine. After that, loosen the clamp and disconnect the fuel pump hose.
2
Unscrew the nuts securing the fuel pump,then remove the pump, spacer (it is installed under the pump) and a gasket (located between the BC and the spacer). Then remove the wires going to the spark plugs, and unscrew the nut that secures to distribute the ignition.
3
Remove the HRH plate. Disconnect the hose from the vacuum regulator, and then remove the ignition distributor. Then remove the generator and remove the belt from the pulleys, and then remove the carburettor hose and the hose, which is designed to supply vacuum to the vacuum regulator, as well as the hose of the crankcase ventilation system.
4
Gently loosen the oil filter,remove the breather cap, then remove the pressure sensor, then the crankshaft pulley. If you left the gasket on the BC, be sure to remove it. Then unbend the tabs of the lock washers.
5
Remove the fixing cylinder head bolts and remove the flywheel. Then remove the oil sump gasket and pump itself. Then remove the drive gear and the oil separator with the drain pipe.
6
Remove pistons and rods, then removemain bearing cap and crankshaft. Remove from all rods inserts and a compression top ring. Then remove the remaining rings and pull out the piston pin.
7
To dislodge the piston pin, arm yourself with a hammer. But do it carefully so as not to damage the part. To process the block you will need a lathe: boring can take several hours.
8
For pressing new fingers in pots, heat in the neck of the connecting rod. Then put the rings on them. After replacing all defective parts, perform engine assembly in reverse order.